Table of Contents
Univention Corporate Client (UCC) is a flexible and very economic alternative for the operation and administration of PCs, notebooks and thin clients in companies and institutions. The software contains a Linux-based desktop environment optimised for business use. In addition, UCC serves as a platform for access to remote desktop solutions and virtualized desktops as well as browser or terminal server-based applications.
The administration is performed using the standard tools of the UCS management system from Univention Corporate Server and integrates seamlessly in the administration of existing domain resources.
This quickstart guide offers an introduction to Univention Corporate Client. Two application scenarios for UCC are presented:
If you only wish to test one of these scenarios, one of the two steps can also be skipped.
UCC also offers the possibility of providing a KDE Linux desktop terminal server remotely via the RDP protocol. It is then possible to access it from thin clients, for example. This is documented in the UCC manual [ucc-manual].
Help on Univention Corporate Client is offered in the Univention Forum: http://forum.univention.de/.
The following systems are required for the quickstart guide:
To test the access to a Windows terminal server from a thin client:
To test the operation of a Linux desktop:
Detailed descriptions of UCC can be found on the website [1] and in the UCC manual [ucc-manual].
UCC requires Univention Corporate Server (UCS) 4.0. The installation of Univention Corporate Server is described in the quickstart guide for UCS [ucs-quickstart].
UCC can be installed on all UCS server roles. In this example, the installation is performed on a single-server system. Therefore, Domaincontroller master has to be selected as system role. No additional component needs to be selected in the software selection. All available errata updates should be installed on the UCS system.
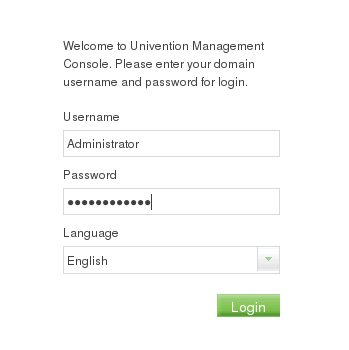
Following successful installation, a login is performed on the Univention Management Console (reachable under https://server_ip/) as user Administrator.
During the first login at the Univention Management Console a dialogue is displayed which allows the activation of the UCS license for the Univention App Center. For this an e-mail address needs to be provided to which the activated license key is sent.
The license key can be imported in the UMC by clicking on the gear-wheel symbol in the upper menu bar. The menu entry needs to be selected.
Now the UMC module needs to be opened.
In the Univention App Center, select the Univention Corporate Client 2.0 application and click on . Following that, a new login to UMC needs to be done.
Now a user must be created in the user management of the UMC. It is sufficient to perform the minimum required settings.
The UMC module must be run. In the first menu item you can select whether desktops and/or thin clients are to be set up. Select and click .
The UCC systems are installed via images, i.e., the complete operating system is replaced during installations and updates (user data are stored separately). This makes it possible to run an installation in just a few minutes. Univention provides preconfigured images which are continuously maintained.
The thin client image must now be downloaded from the Univention server. As it is approximately 300 MB in size, the download may take some time. To do so, enable the option and click on . Once the download is complete, the image is unpacked.
UCS uses so-called network objects to manage IP addresses and DNS/DHCP settings for client systems. Network objects define IP address ranges and provide the next free IP address when a new computer is created.
The following dialogue can be used either to define a new network or to use the network object installed during the installation of the master domain controller.
In the following step, the wizard checks whether a standard gateway is configured in the DHCP. If this is not the case, a dialogue appears in which this can be defined.
The next prompt asks which remote desktop services should be accessed. Select and click .
In addition to the RDP access described here, access to Citrix Terminal Services or a website can also be configured. This is documented in the UCC manual: [ucc-manual-citrix], [ucc-manual-firefox].
The server to be connected to is entered under . If this is a Windows server, the must also be configured.
After clicking on , the configured settings are then shown once again. Clicking applies them. The UCC image is then downloaded and unpacked and different Univention Configuration Registry policies are preconfigured.
Now open the computer module in the UMC and click . Select
computers/ucc-thinclients as the (this
container is linked to policies which are configured in the UCC wizard) and Host:
Univention Corporate Client as the . Then click on
.
You can select any . The network configured in the UCC setup wizard is used as the and an suggested based on this (however, it is also possible to use a different one). In addition, the also needs to be configured. Then click on .
Select Installation with repartitioning and image rollout as the
and the downloaded thin client image
(ucc-2.0-thinclient-image.img) as the .
Then click .
The client has to be started now. A PXE start must be selected in the system's BIOS. The image is started via PXE and the hard-drive partitioned and installed following confirmation. The domain join to the UCS domain is performed in the scope of the installation. The join is performed with the Administrator account.
The domain join can also be performed completely automated [ucc-manual-automaticrollout].
The session must now be selected in the LightDM login manager. A login can now be performed with the user created in the UMC. A connection to the Windows terminal server is created automatically and it is possible to work on the terminal server.
The UMC module must be opened. In the first menu item you can select whether desktops and/or thin clients are to be set up. Select and click .
The UCC systems are installed via images, i.e., the complete operating system is replaced during installations and updates (user data are saved separately). This makes it possible to perform an installation in just a few minutes. Univention provides preconfigured images which are continuously maintained.
The desktop image must now be downloaded from the Univention server. As it is approximately 1 GB in size, the download may take some time. To do so, enable the and click on . Once the download is complete, the desktop image is unpacked. The UCS system should have at least 20 GiB of free disk space.
UCS uses so-called network objects to manage IP addresses and DNS/DHCP settings for client systems. Network objects define IP address ranges and provide the next free IP address when a new computer is added.
The following dialogue can be used either to define a new network or to use the network object installed during the installation of the master domain controller.
In the following step, the wizard checks whether a standard gateway is configured in the DHCP. If this is not the case, a dialogue appears in which this can be defined.
The configured settings are then shown once again. Clicking applies them. The UCC image is then downloaded and unpacked and different Univention Configuration Registry policies are preconfigured.
Now open the computers module of the UMC and click . Select
computers/ucc-desktops as the (this
container is linked to policies which are configured in the UCC wizard) and Host:
Univention Corporate Client as the . Then click on
.
You can select any . The network configured in the UCC setup wizard is used as the and an suggested based on this (however, it is also possible to use a different one). In addition, the also needs to be configured. Then click on .
Select Installation with repartitioning and image rollout as the
and the downloaded desktop image
(ucc-2.0-desktop-image.img) as the . Then click
.
The client has to be started now. A PXE start must be selected in the system's BIOS. The image is started via PXE and the hard-drive partitioned and installed following confirmation. The domain join to the UCS domain is performed in the scope of the installation. The join is performed with the Administrator account.
In a productive UCC installation, the domain join can be performed completely automated [ucc-manual-automaticrollout].
The session must now be selected in the LightDM login manager. The login can now be performed with the user created in the UMC. The user can then work with a KDE Plasma desktop.
[ucc-manual] Univention GmbH. 2014. Univention Corporate Client - Manual for administrators. http://docs.univention.de/ucc-manual-2.0.html.
[ucs-quickstart] Univention GmbH. 2014. Quickstart Guide for Univention Corporate Server. http://docs.univention.de/quickstart-en-4.0.
[ucc-manual-citrix] Univention GmbH. 2014. UCC manual - Citrix XenApp terminal services. http://docs.univention.de/ucc-manual.html#terminalservices:citrix.
[ucc-manual-firefox] Univention GmbH. 2014. UCC manual - Firefox session script. http://docs.univention.de/ucc-manual-2.0.html#logins:firefox.
[ucc-manual-automaticrollout] Univention GmbH. 2014. UCC manual - Configuration of a fully automated rollout. http://docs.univention.de/ucc-manual-2.0.html#rollout:automatic.