1. Introduction#
UCS@school is an extension for Univention Corporate Server (UCS). The installation consists of two steps:
UCS installation
Installation of the extension UCS@school
This quickstart guide describes the installation and setup of UCS@school in a step-by-step guide.
2. UCS installation#
UCS@school can be installed in two variants:
As a single server environment for installations at individual schools
As a multi-server environment for environments with multiple schools
This quickstart guide describes the installation as a single-server environment. For more information about multi-server environments, see Installation of UCS@school in a multi-server environment and Installation einer Multi-Server-Umgebung in UCS@school - Handbuch für Administratoren [1].
UCS is available as a 64 bit variant (amd64) free of charge in the download area. Alternatively, UCS can also be installed in the Amazon EC2 Cloud (see Installation in the Amazon EC2 cloud in Univention Corporate Server - Manual for users and administrators [2]) and used for UCS@school. Furthermore, the VMware image for UCS can also be used for the installation of UCS@school (see Installation in VMware in Univention Corporate Server - Manual for users and administrators [2]) and the extension UCS@school can be installed in it. The different settings described next also apply here.
For installation, choose the following different settings from the UCS Quickstart Guide Quickstart Guide for Univention Corporate Server [3] to install UCS@school:
- System role
Primary Directory Node
- Software selection
All selection components can be removed here. The later installation of the UCS@school extension will install all necessary dependencies automatically.
Caution
Make sure that the hostname consists only of lowercase letters, digits, and the hyphen (a-z, 0-9, and -), and may contain only single periods to separate them. The hostname may also only begin with a lowercase letter, end with a lowercase letter or a digit, and is limited to a length of 15 characters.
3. Installing the UCS@school extension#
The following section describes the installation of the extension UCS@school on a UCS system through Univention App Center. For this purpose, a login with the administrator account (username: Administrator) to the Univention Management Console (https://server_ip/umc or http://server_ip/umc) must take place.
When signing in for the first time, a UCS license for the Univention App Center must be activated in the UMC module Welcome! In the dialog opened through Request new license, an email address must be provided for this purpose, to which the license key will be sent.
The license key can be imported through the UMC module Welcome! The menu item Import new license must be selected. After importing the license key, the Univention App Center can be used.
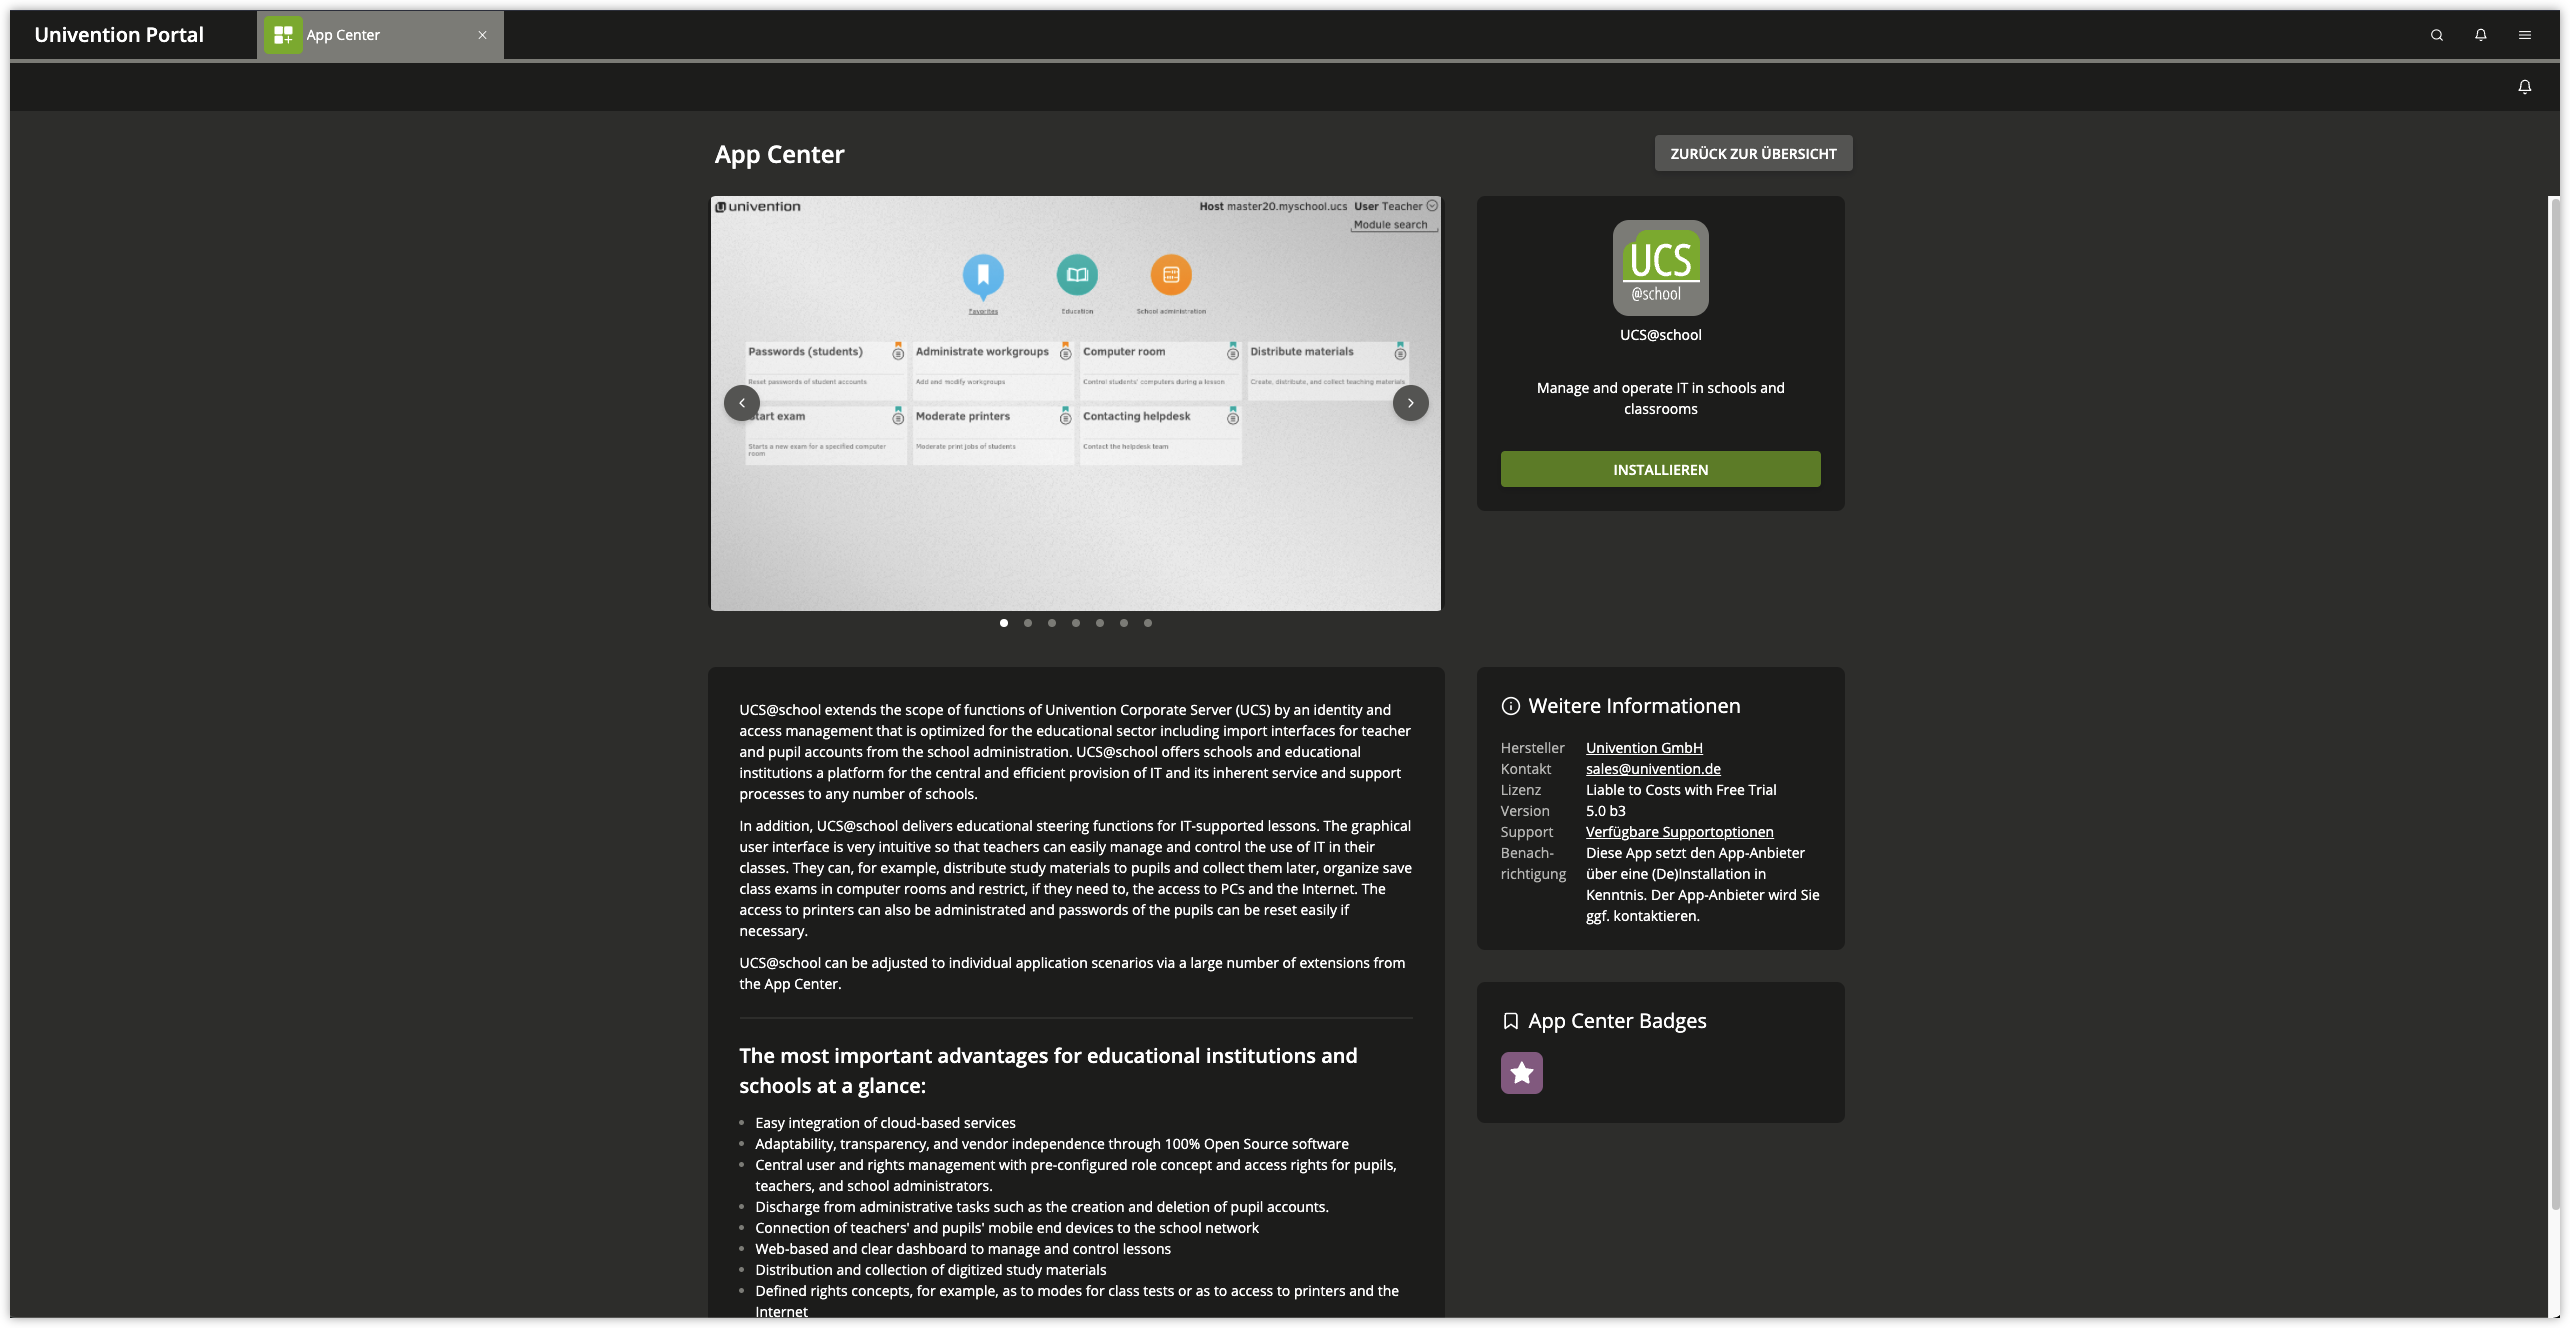
In the UMC App Center module, select the UCS@school application and then click Install. After completing the installation of UCS@school, the new module UCS@school configuration wizard can be selected in the Univention Management Console.
By default, a demonstration school including test users is configured on the Primary Directory Node during the initial installation of UCS@school. The school is named DEMOSCHOOL and can be used for testing purposes. The password for the automatically created users demo_student, demo_teacher and demo_admin is located in the file /etc/ucsschool/demoschool.secret. To prevent the creation of the demonstration school, the UCR variable ucsschool/join/create_demo must be set to the value no before going through the UCS@school configuration wizard. Setting the UCR variable is possible either through the UMC module Univention Configuration Registry or on the command line with the command ucr set ucsschool/join/create_demo=no.
The wizard accompanies the necessary configuration steps for UCS@school:
In the first step the option Single server environment is selected.
Then the name of the school and a school abbreviation are defined, for example Gesamtschule Nord and gsnord.
With the confirmation of the settings, the system is configured and required packages are installed automatically. The question about restarting the UMC should be agreed to so that the UCS@school modules are immediately available. After completing the configuration, the installation of UCS@school is finished.
4. Management of student and teacher account data#
In a standard UCS installation, all user accounts are of the same type and differ only by their group memberships. In a UCS@school environment, each user is assigned to a role, from which permissions in the UCS@school administration are derived:
- Students
Students are not granted access to the administration interfaces by default. They can only sign-in to Windows clients with their user accounts and use the file shares and printers shared with them.
- Teacher
Teachers are granted additional rights compared to students, for example to access UMC modules that allow resetting student passwords or selecting internet filters. The modules that are available to teachers can be defined individually. However, teachers are usually only given access to a part of the functions provided by the Univention Management Console.
- School Administrator
Full access to the school administration functions of UCS@school is given to school administrators. They can, for example, combine computers into computer groups, define new internet filters or even reset teacher passwords.
During configuration through the wizard, a school name has already been configured.
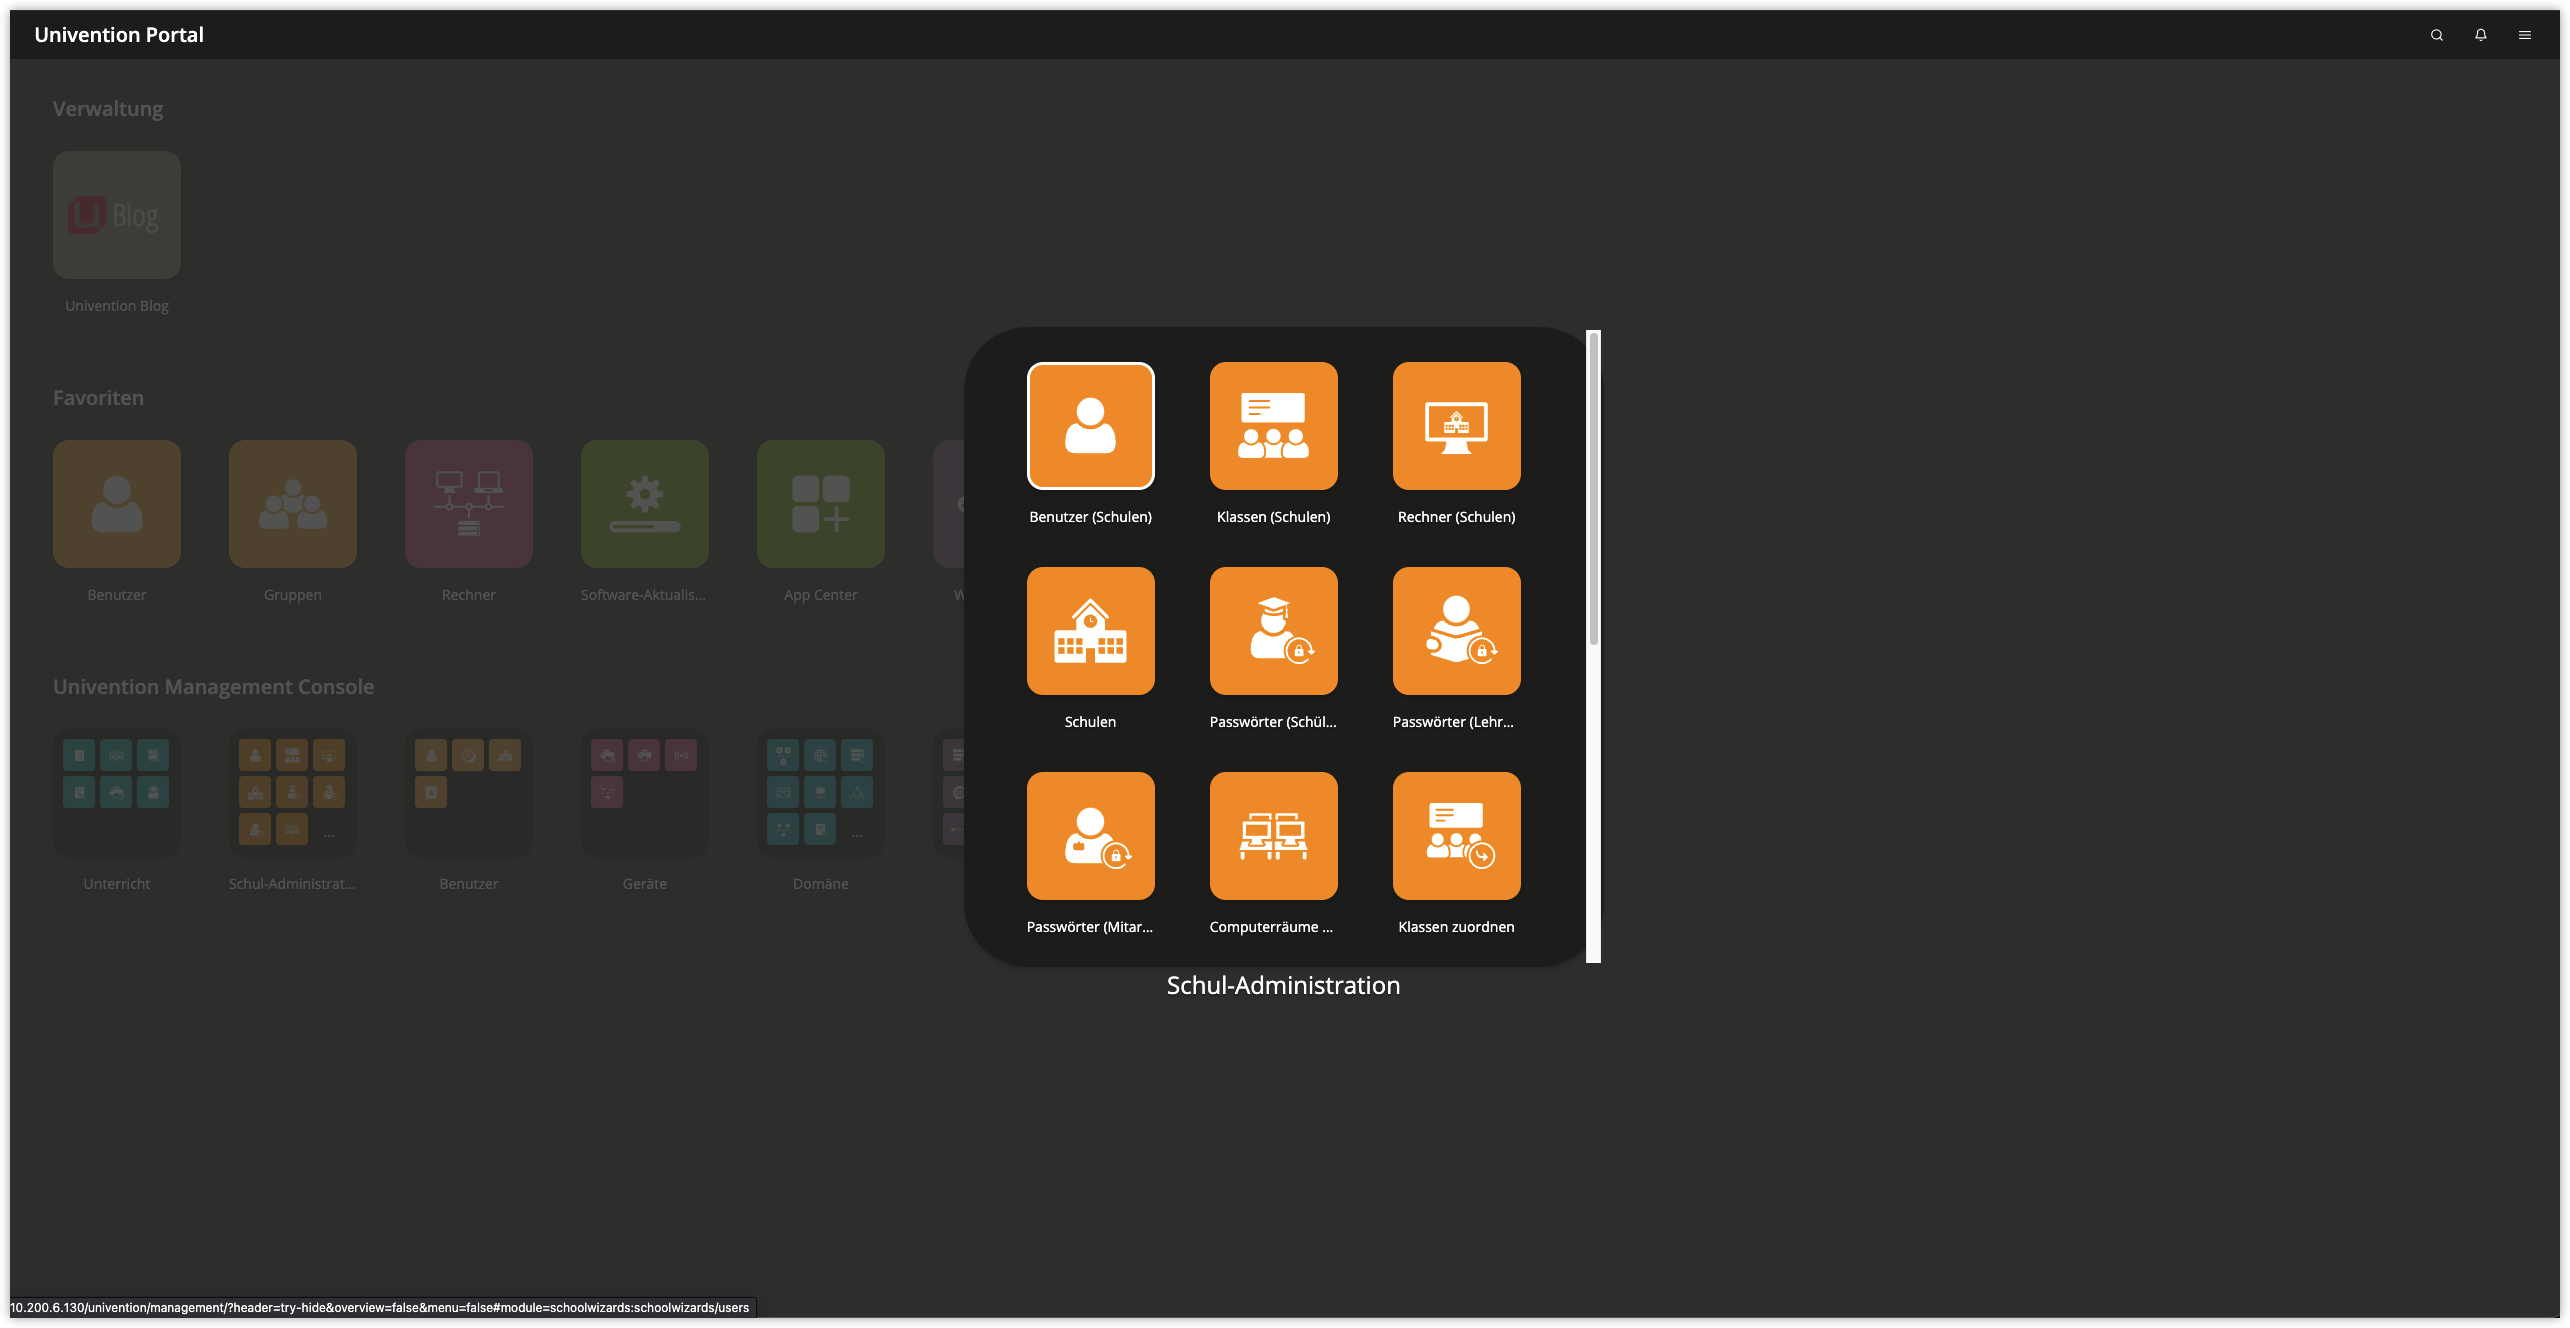
Next, a school class must be created. In the Univention Management Console, a school class can be defined with Classes (Schools) from the School Administration section, for example 1a.
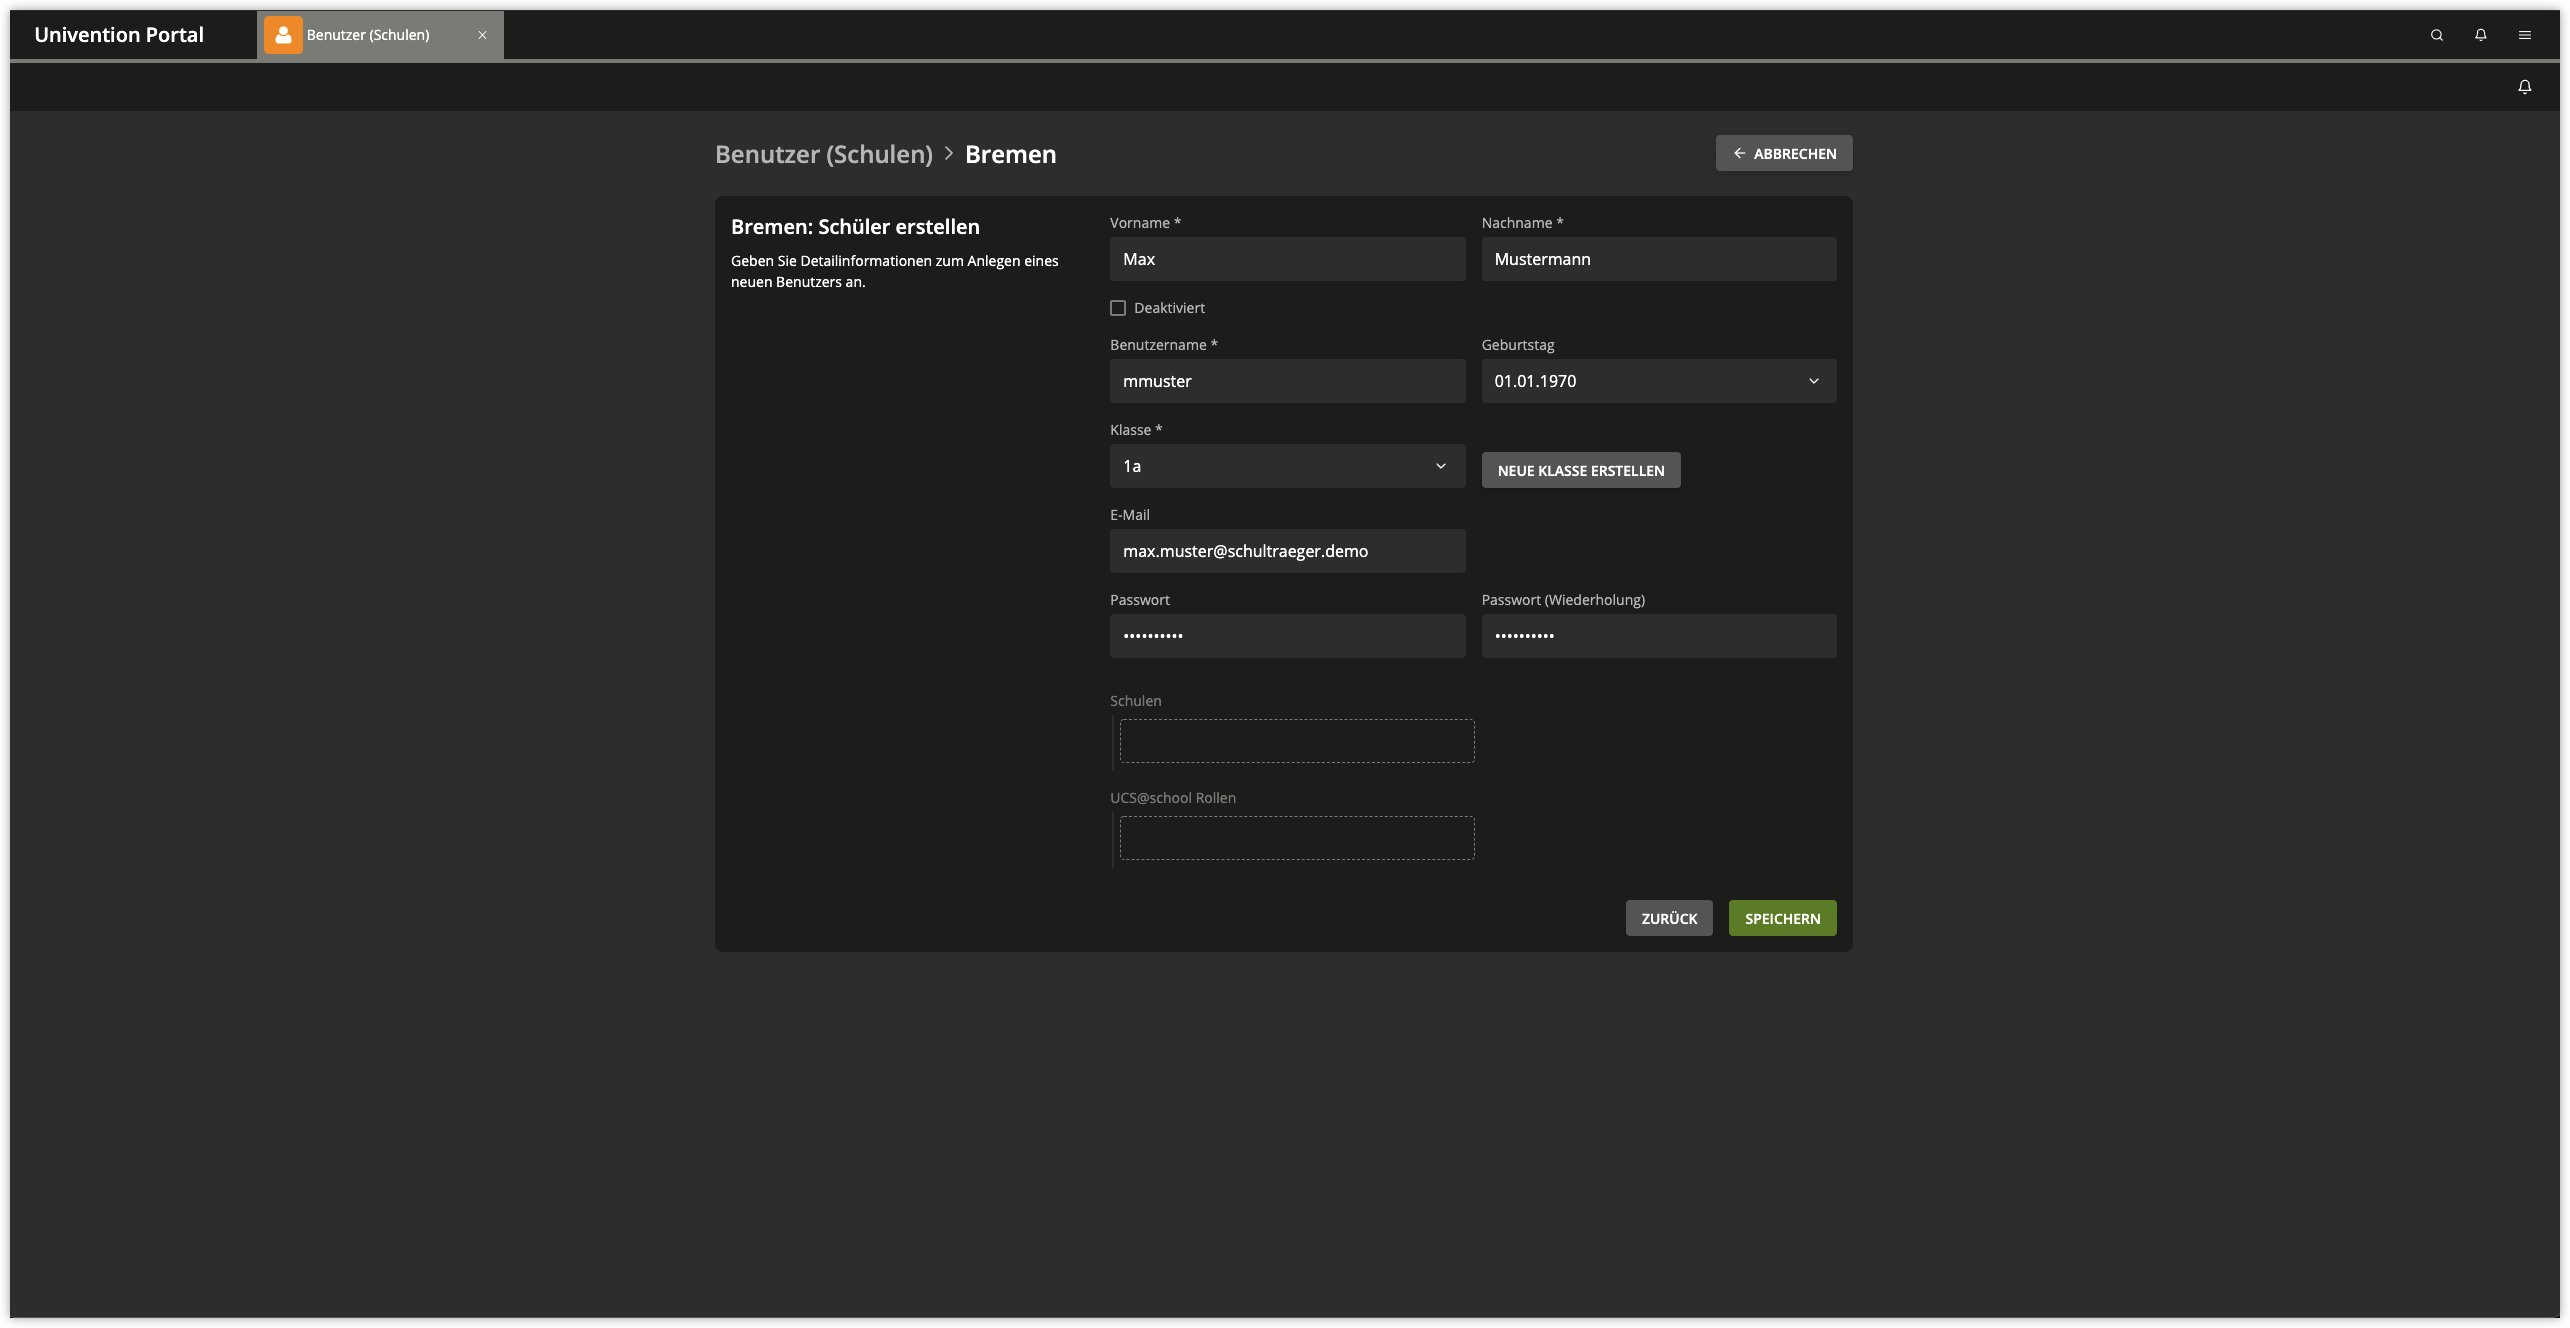
Now two students and one teacher account are created through the Users (Schools) module. Both student accounts should be assigned the class just created. Finally, the created teacher account is assigned to the class with Assign teacher classes.
The creation of users described above is done in most UCS@school installations, for example by automated import scripts. The primary administration of student account data is usually still done in the school administration software used by the respective school administration. User account data of students and teachers are exported from the school administration software and imported into UCS@school through supplied import scripts (typically at the change of school year). Computer accounts and printers can also be imported through these import scripts.
5. Modules#
UCS@school provides a number of modules for the Univention Management Console that can be used for IT-supported teaching. The modules are briefly described below. A detailed description of how to use the modules can be found in UCS@school - Handbuch für Lehrkräfte und Schuladministratoren [4].
Some modules are available to teachers and school administrators and some modules are only available to school administrators. Depending on whether the login is with one of the teachers created above or the administrator, only a selection of modules will appear. Students don’t get access to the modules.
- Passwords (students)
Passwords (students) allows teachers to reset student passwords. The existing student passwords cannot be read for security reasons; if students forget their password, a new password must be assigned. School administrators are also allowed to reset teacher passwords.
- Computer room
The module Computer room allows the control of student PCs and internet access during a lesson. Internet access can be blocked and allowed and individual internet pages can be specifically allowed. If the appropriate software (Veyon) is installed on the student PCs, it’s also possible to control these PCs. For example, the screen can be locked so that undivided attention can be focused on an experiment during a chemistry lesson. In addition, a PC’s screen content can be transferred to other systems. This allows teachers to give presentations even without a video projector.
- Manage computer rooms
With the module Manage computer rooms computers of a school are assigned to a computer room. These computer rooms can then be managed centrally by the teachers, for example by enabling internet access.
- Contact helpdesk
Each school is supported by a helpdesk, which is usually provided by the school administration. Using the module Contact helpdesk, teachers and school administrators can submit a request.
- Edit workgroups
Each student is a member of his or her class. In addition, there is the possibility with the module Edit workgroups to assign students to cross-class workgroups. Creating a workgroup automatically creates a data area on the school server to which all members of the workgroup have access. Teachers can add or remove students from workgroups, but cannot create new workgroups. This must be done by a school administrator. The Edit Workgroups module allows school administrators to create new workgroups and assign teachers to them in addition to students.
- Moderate printer
With the module Moderate printer printouts of the students can be checked. The pending print jobs can be viewed by the teacher and either discarded or forwarded to the printer. This avoids unnecessary or incorrect printouts.
- Distribute materials
The module Distribute materials simplifies the distribution and collection of teaching materials to individual students, classes or working groups. Optionally, a deadline can be set. This makes it possible to distribute tasks that have to be completed by the end of the lesson. After the deadline, the distributed materials are then automatically collected again and stored in the teacher’s home directory.
- Lesson times
The Lesson times module allows school administrators to define the time periods of each teaching hour per school.
- Assign teacher classes
There is a common file share for each class. In order for teachers to access this file share, they must be assigned to the class using the Assign teachers to classes module.
- Define Internet rules
A proxy server is used to filter internet access. When an internet page is called up, it checks whether access to this page is permitted. If this is not the case, an information page is displayed. For example, if students are to research Wikipedia during a lesson, a rule list can be defined that prevents access to all other internet pages. This rule list can then be assigned by the teacher. With the function Define Internet rules the rules can be managed.
6. Domain joining of a Microsoft Windows client#
Microsoft Windows clients are integrated and managed using Samba. The Windows clients authenticate themselves against the Samba server. File and print services are also provided for the Windows clients through Samba. UCS@school integrates Samba 4. It supports domain, directory and authentication services compatible with Microsoft Active Directory. This enables the use of user management tools or group policies (GPOs) provided by Microsoft.
First, the PC must be registered in the Univention Management Console. There, the module Add computer must be used in the module group UCS@school Administration. As computer type select Windows system. The specification of name, IP address and MAC address is mandatory. The Subnet mask can be left at the default in most cases.
Now the Microsoft Windows client joins the domain The joining can only be done with a Windows version with domain support, that means the Home Edition of Microsoft Windows isn’t suitable.
The Windows client must be able to resolve DNS entries from the DNS zone of the UCS domain, that means the school server should be entered as DNS server in the network settings of the Windows client.
The current time must be configured on the Windows system. When working with virtualization, it must be noted that suspend/resume cycles can lead to incorrect system clocks.
Via the basic configuration dialog can be reached. Now Change settings must be selected and Change must be clicked.
To join the domain, the domain name of the school selected during installation must be used under Domain. After clicking OK, the Administrator must be entered in the Change computer name, or domain input field under Name and the administrator password used when setting up the Primary Directory Node must be entered in the Password input field. Now the domain joining can be started with a click on OK.
Finally, the client should be restarted.
Joining the domain automatically creates an entry in the computer administration and DNS records for the Microsoft Windows client. Further notes can be found in Computer management in Univention Corporate Server - Manual for users and administrators [2].
See also
- Windows domain joins
for detailed steps in Univention Corporate Server - Manual for users and administrators [2].
7. Management of Microsoft Windows clients#
The network configuration of the Microsoft Windows clients is performed through DNS and DHCP services integrated in UCS. The MAC and IP addresses are assigned directly during import. Further information can be found in Import von Rechnerkonten in UCS@school - Handbuch für Administratoren [1].
Student and teacher Windows PCs can be configured through group policies and is described in Configuration and management of Windows desktops in Univention Corporate Server - Manual for users and administrators [2].
The Veyon software can be installed on the students’ Windows clients. It is used by the UMC Computer Room Management module and allows teachers to restrict the students’ desktop and, for example, lock screens and input devices. Also, a presentation mode can be enabled that transfers the screen output of the teacher’s desktop to the student screens. Veyon is documented in Computerraumüberwachung in UCS@school mit Veyon in UCS@school - Handbuch für Administratoren [1].
8. Installation of UCS@school in a multi-server environment#
When installing UCS@school in a multi-server environment, there is a central server in the school administration and a local school server at each school. This school server runs all services such as the shares for the students’ home directories, the proxy server or the print services. The LDAP data is replicated selectively, that means only the data for the respective school is stored on the individual school servers.
The installation described in this quickstart guide can be extended to a multi-server environment by installing additional school servers. The steps required to do this are described in Installation einer Multi-Server-Umgebung in UCS@school - Handbuch für Administratoren [1].
9. Further information#
Detailed descriptions of the concept and administration of UCS@school can be found in UCS@school - Handbuch für Administratoren [1].
For teachers there is also a separate document UCS@school - Handbuch für Lehrkräfte und Schuladministratoren [4], which describes how to use the web-based administration interfaces.
Answers to frequently asked questions can be found in the Support and Knowledge Base.
Questions about UCS can also be asked in the Univention forum.
Quickstart Guide for Univention Corporate Server [3].
UCS@school - Handbuch für Administratoren. Univention GmbH, 2025. URL: https://docs.software-univention.de/ucsschool-manual/5.2/de/index.html.
Univention Corporate Server - Manual for users and administrators. Univention GmbH, 2025. URL: https://docs.software-univention.de/manual/5.2/en/.
Quickstart Guide for Univention Corporate Server. Univention GmbH, 2025. URL: https://docs.software-univention.de/ucsschool-quickstart/5.2/en/.