3. App lifecycle#
This section relates the lifecycle of an app from the first app development, its life in the public to termination. The lifecycle applies to the app overall and to every single version.
3.1. Development#
Every app starts with its development. It involves the definition of the app in the App Provider Portal, providing the software solution as a Docker image, see Get Started, and the integration of the solution with UCS, for example in the identity management area, see Connection with Identity Management. This part of the lifecycle can be divided into two steps: setup and integration.
3.1.1. Best practice for app development environment#
This section briefly describes best practices on the development and testing environment for apps dedicated to the Univention App Center. The recommendations aim at reducing repeatable time efforts that, for example, are caused by the download of Docker images.
The development of apps mainly involves the App Provider portal and a
local instance of Univention Configuration Registry (UCR). To setup your UCS environment the best
practice is to download one of the UCS virtual machine images and use
VirtualBox or VMware, see Download UCS. After
the installation, activate the
system
and copy your SSH key to the UCS system to save typing the password on
each remote console login. Finally, activate the Test App Center, see
Test App Center. With that status it’s
a good time to make a snapshot of the system, which allows to got back
to that status. Afterwards, app specific time consuming tasks can be
prepared to reduce recurring waiting times. Among them are for example
an optional docker login to gain access to a private Docker image or
even the own Docker registry, and the manual download of the app’s
Docker image(s) with docker pull (for single container apps) or
docker-compose -p $appid pull (for multi container apps) from the
within the docker-compose.yml directory of the app, see
Debugging. And then also make a new snapshot.
Especially, having the Docker image(s) locally saves download time
during recurring installation test cycles.
With the last snapshot there is a prepared system that can serve as starting point for app installation and associated testing. The development iteration cycles are a dance of changes in the App Provider portal and testing the installation and app integration. After returning to a snapshot, it’s recommended to update the local App Center cache. This is either automatically done during login and opening of the App Center module in the UCS management system or triggered manually with univention-app update on the console.
3.2. Testing#
Testing the app is the final part of its development. It typically involves a combination of manual and automatic tests. In order to test the app with UCS, please follow these instructions.
3.2.1. Download UCS#
Download UCS to get a copy of UCS free of charge from the Univention website. Choose an ISO image or a pre-installed virtual machine image for various virtualization hypervisors, like for example VMware (ESXi and Workstations), VirtualBox and KVM.
3.2.2. Initial UCS setup#
Please refer to the Quickstart Guide for Univention Corporate Server for the first steps about installation and initial setup.
3.2.3. Test App Center#
Switch to the Test App Center Repository and test the app directly on the UCS system set up before.
$ univention-install univention-appcenter-dev
$ univention-app dev-use-test-appcenter
3.2.4. Install the app#
Up until here, the app is available in the Test App Center and a UCS system is up and running that is configured against the Test App Center. The app can be installed via the Univention Management Console. UMC consists of several modules and one of them is called App Center. Open this module and install the app from there.
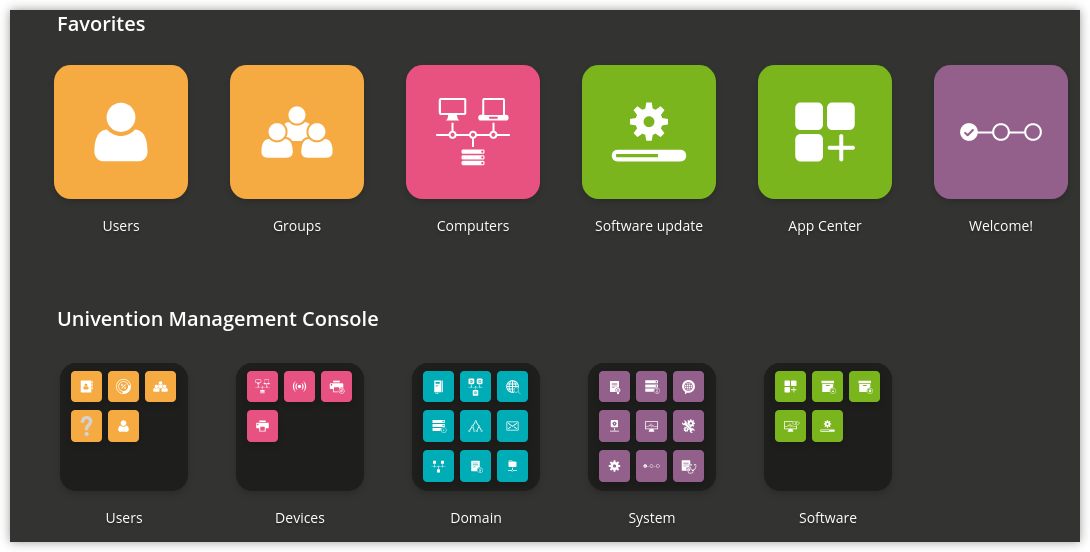
Fig. 3.1 Univention Management Console overview with App Center Module#
The following points are mandatory for the App to be published:
The App has to install without user interaction. Exceptions are configuration parameters obtained through App Settings, see App settings.
The App may not negatively impact UCS’ core services.
The App has to uninstall without leaving any remainders that interfere with UCS’ core services.
The app is working with the UCS versions that are configured as Supported UCS version, see Supported UCS versions.
When installing the App, also mind README information that may have
been defined on the Additional texts tab in the app in the App Provider
Portal after activating it with the option Additional texts with
information for UCS system administrators on the Overview tab in the
Modules section. An Administrator expects an app to be fully configured
after the installation. If something is needed in order to use the app,
such as activating users for the service, it should be described in the
appropriate README section, see README for the
administrator.
3.2.5. Upgrade the app#
Once several versions of the app exist, the upgrade should be tested, as well. The App Center UMC module only allows the installation of the latest app version. To test an upgrade of the app, please go to the console and install a version explicitly:
$ univention-app install myapp=1.0
Afterwards, go back to the App Center UMC module. There, the app should show up with the update symbol indicating the availability of an update. Continue and perform the app upgrade.
3.2.6. Test checklist#
The following list gives an idea what the app provider should test before the app is approved for release or update. The list cannot cover all possible items, but mentions what is missed repeatedly.
Integration with UCS identity management: Does the login with activated users work? Will the login be blocked for users that are not activated for the app?
Environment with proxy: How does the app behave when a proxy is configured in the UCS environment? Does the app take the proxy settings into account? Does the app work as expected? Is the networking still working properly for the app?
Description and documentation: Are the texts consistent in content? Can they be understood easily? Is the description of technical steps complete and correct, especially path and file names?
3.2.7. Deactivate the Test App Center#
To switch back to the productive App Center, please run:
$ univention-app dev-use-test-appcenter --revert
3.2.8. Automated testing for App Providers#
Univention always runs automated tests on an app before it’s released. This testing infrastructure can be used by the app provider to increase the test coverage for the app. This can save manual testing efforts.
A test script for the app can be provided in the Testing tab. The script needs to be entered in the text area Test script run after installation. It’s run together with the automatic app tests in the Univention test infrastructure and will be executed after the app has been installed during those tests.
On successful tests, the script has to end with exit code 0.
--binddn and --bindpwdfile are passed, so that the command line
interface of UDM can be used easily. Here is an example:
#!/bin/sh
set -e
udm users/user create "$@" \
  --set username=myapp-test-user \
  --set password=s3cr3t-pwd \
  --set lastname=Test \
  --set myappActivated=TRUE
sleep 10
curl http://localhost/myapp/login ...
For certain tests user credentials for access to the directory service
are needed. They are passed with the parameters binddn and
bindpwd. In many cases the user Administrator is used. The
Administrator credentials are only important for UDM calls on UCS
systems that are not the Primary Directory Node.
The test script can be manually tested.
$ univention-install univention-appcenter-dev
$ univention-app dev-use-test-appcenter
$ univention-app install my-app
$ univention-app dev-test-setup  # installs common testing libs like selenium
$ univention-app dev-test \
  --appcenter-server http://appcenter-test.software-univention.de \
  my-app \
  --binddn "$DN" \
  --bindpwd "$BINDPWD"
3.2.9. Debugging#
During app development or for problem analysis it may be necessary to debug an app. If an app installation fails, the App Center removes the Docker container and thus prevents the developer to have a deeper look into what happened. With the following command the App Center will not throw away a failed app installation. The container is kept on the system.
$ univention-app install myapp --do-not-revert
For debugging or support cases it can be helpful to enter the app container. The following command opens a shell in the container.
$ univention-app shell myapp
If the container does not support a shell, the container can be entered with the plain Docker commands.
$ CONTAINER="$(ucr get appcenter/apps/myapp/container)"
$ docker exec "$CONTAINER" ...
To view the Docker log files for the app, please use the following command:
$ univention-app logs $appid # equivalent to docker logs $CONTAINER
For multi container apps using Docker compose, those logging information can be viewed with:
$ cd /var/lib/univention-appcenter/apps/$appid/compose
$ docker-compose -p "$appid" logs
Important log files on the UCS host for debugging are:
/var/log/univention/appcenter.log/var/log/univention/management-console-module-appcenter.log/var/log/univention/join.log/var/log/docker.log
3.3. Two-way approval#
Testing the app also involves giving an approval for the release of the app. Each app in the App Center requires a two-way approval, one from the app provider and one from Univention. The app provider starts with the process and performs the tests to give the approval for its app.
The app provider’s approval is given by clicking on Approve for release in the App Provider Portal. The Univention App Center team is notified and they will start the automated tests. As soon as the automated tests are successful, the second approval is available and the app is ready to be released.
The automated tests conducted by Univention test for installation, un-installation and re-installation of the app for different UCS system roles. They check for proper operation of the UCS services. No app functionality will be tested. The tests are for ensuring that the app does not break UCS functionality.
Besides the technical testing, the first release also undergoes a manual review process on the app presentation. The app description is checked for plausibility, understandability and for the App Center context.
3.4. Release#
As soon as the app is ready for release, it’s copied to the productive App Center by the Univention App Center team. This involves the app’s presentation material as well as the Docker image. Univention maintains an own Docker registry. The Docker image is copied to that registry and the reference to the Docker image is updated accordingly in the app definition. The app will be visible in the App Center UMC module immediately for all UCS users after release. The app catalog is updated automatically and shows the new app.
3.5. Updates#
After the release of the first version the app enters “maintenance mode” and receives updates from the app provider. The evolution of an app is represented by its version. In order to provide an update for the app, follow these steps:
Go to the Apps UMC module in the App Provider Portal and search for the app.
To create a new version of the app, mouse over the app’s tile, right click and select New App Version.
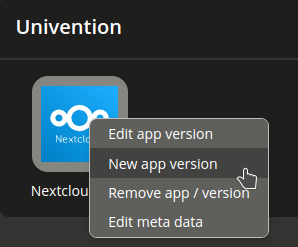
Fig. 3.2 Menu to add a new App#
Enter the values for source and target version. The App Provider Portal will then copy the source app configuration to the target.
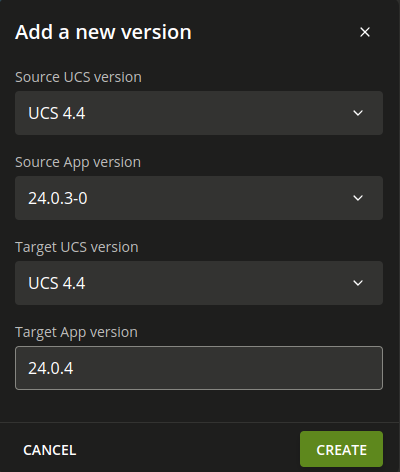
Fig. 3.3 Add a new App version#
Open the new app version and make the appropriate changes, e.g. the version tag for the Docker image. Usual places for changes involve the scripts and maybe the integration. Texts and logos should be checked if they are still up to date.
3.6. Termination (end of life)#
If the app provider decides to discontinue an app and stop maintenance, the app can be terminated by setting it end of life. As soon as an app is published in status end of life, UCS system administrators won’t be able to install it anymore. UCS systems that already have the app installed, will show a notification in the App Center that informs the UCS system administrator that they should look for alternative solutions.
App versions are not explicitly terminated. They are superseded by the next version. The termination applies to the whole app.
The app can be terminated by going to the app’s configuration in the App
Provider Portal. Please go to the Advanced tab to the section
Custom configuration. Create a new custom configuration with the
Custom key EndOfLife and the Custom value True.
Afterwards press Save and Approve for release. Please
provide a custom message in the publish dialog and let the App Center team know
about the reasons for the termination.
3.7. App Provider Portal upload interface#
An app is configured via the App Provider Portal, which offers a web interface. There is also an upload interface available. If the developer prefers to keep the app configuration in a version control system, the upload interface offers a good way to push changes for the app to the Test App Center. The script can also be used in non-interactive mode within other scripts. In such cases username and password should be stored in separate files (no new line at the end) that are passed as parameters.
The scripts needs to be downloaded. It requires Python 3.7 and cURL to run. For a list of available actions and their parameters, use the script’s help:
$ ./univention-appcenter-control --help
$ ./univention-appcenter-control upload --help
The following examples show how the script can be used.
# creates a new version based on the latest version of myapp
$ ./univention-appcenter-control new-version 5.0/myapp

# finds out on which UCS versions this Docker App may be installed
# Note: jq is an external tool: apt-get install jq
# you may parse JSON without it, of course
$ ./univention-appcenter-control get --json 5.0/myapp |
  jq '._ini_vars.SupportedUCSVersions'

# creates version 2.0 of myapp based on the (formerly) latest version
$ ./univention-appcenter-control new-version 5.0/myapp 5.0/myapp=2.0

# sets the DockerImage of the new app
$ ./univention-appcenter-control set 5.0/myapp=2.0 \
  --json '{"DockerImage": "mycompany/myimage:2.0"}'

# copies myapp Version 1.0 from UCS 4.4 to UCS 5.0.
$ ./univention-appcenter-control new-version 4.4/myapp=1.0 5.0/myapp=1.0

# uploads all README files in the current folder to the latest version
# myapp in UCS 4.2
$ ./univention-appcenter-control upload 5.0/myapp README*

# uploads an image. Will be rejected if this image is not specified
# somewhere in the ini file. Note: This may overwrite the logo for other
# version using the same logo name, too.
$ ./univention-appcenter-control upload 5.0/myapp=1.0 myapp.svg
The script can also be used to automate the creation of a new app version for an app update. The generics steps are the following:
Create a new version in the provider portal via the upload script based on the latest published version.
For single container apps update the reference to the app’s Docker image and its version. For multi container apps, download the compose file, update the references to the Docker images of the services there and upload the compose file.
Perform the usual tests before approving an app update for release.
Send an email to the App Center team and approve the release. Please provide information about the UCS section, the app’s version and the internal component reference. It’s best to provide this information in the email’s subject and it can look like this: “Regarding 4.4/myapp=4.74 (myapp_20201106183244)”
The following examples show how to run the steps with the upload interface. The examples assume that the password to the portal is stored in a password file which is given as parameter to the script:
$ APP_UPGRADE_FROM="12.1"
$ APP_VERSION="12.2"
$ UCS_MINOR="4.4"
$ MY_APP="myapp"
$ MY_USERNAME="my_username"
$ PWD_FILE="portal_password"

# 1. Create a new version in the app provider portal
$ ./univention-appcenter-control new-version \
  --username "$MY_USERNAME" \
  --pwdfile "$PWD_FILE" \
  "$UCS_MINOR/$MY_APP" \
  "$UCS_MINOR/$MY_APP=$APP_VERSION"

## First example for single container apps
# 2. Update the reference to the app Docker image
$ ./univention-appcenter-control set \
  --username "$MY_USERNAME" \
  --pwdfile "$PWD_FILE" \
  "$UCS_MINOR/$MY_APP=$APP_VERSION" \
  --json '{"DockerImage": "my_company/'"$MY_APP:$APP_VERSION"'"}'

# 3. Obtain the component id of the new app version.
# The command asumes the latest component is the new app.
$ COMPONENT=$(./univention-appcenter-control status \
  --username "$MY_USERNAME" \
  --pwdfile "$PWD_FILE" \
  "$UCS_MINOR/$MY_APP" | sed -rne 's/^ *COMPONENT: +//p;T;q')

# 4. Send the email
$ SUBJECT="Regarding $UCS_MINOR/$MY_APP=$APP_VERSION ($COMPONENT)"

####
# Second example for multi container apps
# 2. Get app configuration data

$ ./univention-appcenter-control get \
  "$UCS_MINOR/$MY_APP=$APP_VERSION" \
  --json \
  --username "$MY_USERNAME" \
  --pwdfile "$PWD_FILE" > "$MY_APP.json"

# 3. Extract the compose content
$ jq -r .compose < "$MY_APP.json" > compose

# Edit the compose file accordingly. A custom script can help to automate this step.
# This script depends on the app and the compose file content
# Replace the "image: " lines and refer to the upstream Docker images and their respective tags

# 4. Upload altered compose file
$ ./univention-appcenter-control upload \
  --username "$MY_USERNAME" \
  --pwdfile "$PWD_FILE" \
  --non-interactive \
  "$UCS_MINOR/$MY_APP=$APP_VERSION" compose

# 5. Send the mail and with subject as described above