7.1. Computers module#
Deployment — Kubernetes & UCS appliance
The Computer management module appears in both deployments. However, administrators mostly use it in the context of the UCS appliance with its network management capabilities.
This page describes the available pages of the Computers management module in the Management UI. It’s for functional administrators who manage computers and other devices. The following sections describe each tab of the module in detail.
The Computer management module enables functional administrators to create, modify and delete computer objects through the Directory Manager. You find the Computers management module in the Management UI at , as shown in Fig. 7.2.
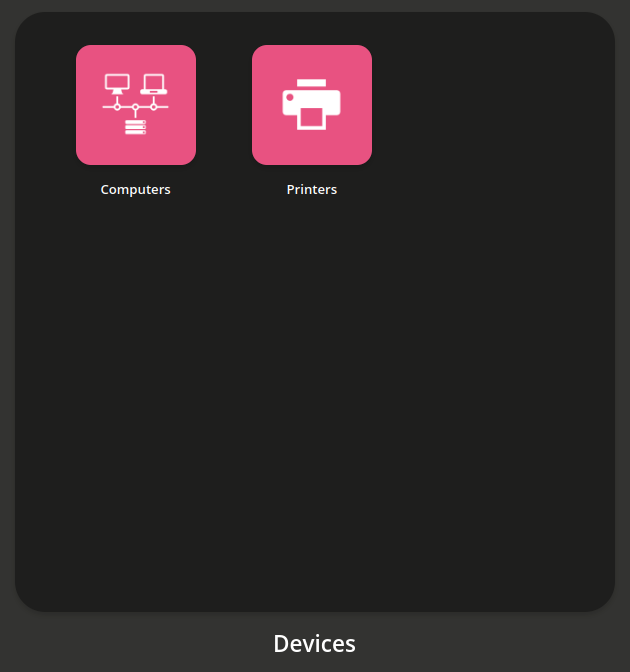
Fig. 7.2 The Computers management module in the device section of the Management UI#
7.1.1. Create computer wizard#
The Computers module provides a wizard to quickly create a computer object. To add a computer object, click Add in the list view of the module, as you can see in Fig. 7.3.

Fig. 7.3 The list view of the Computers management module without entries.#
On the first page, the wizard asks you to provide a Type and a Container in the Directory Service.
- Type
The type defines the purpose of the computer object. Depending on the type, the Computers management module shows or hides define attributes.
- Container
The container defines the location of the object in the directory structure of the Directory Service.
On the second page in Fig. 7.4, the wizard asks for the most important attributes of a computer object, such as name, network, MAC address, and IP address. The only mandatory field is the name. To provide more attributes, click the Advanced. The General tab opens. For a description of the fields, see General tab - Computer management.
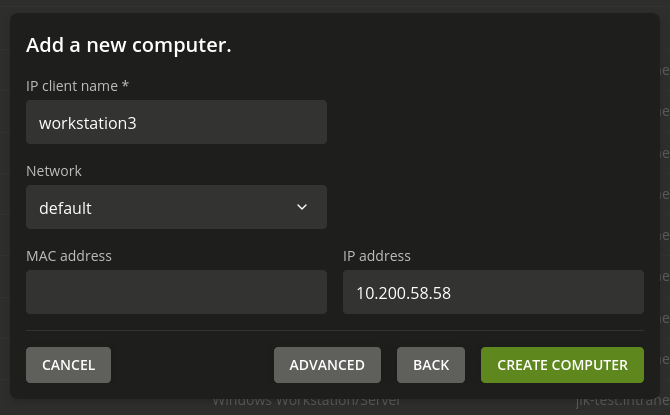
Fig. 7.4 Creating a computer in the Computers management module#
7.1.2. General tab - Computer management#
This section describes the General tab in the Computer management module and its fields. Fig. 7.5 shows the content of the General tab.
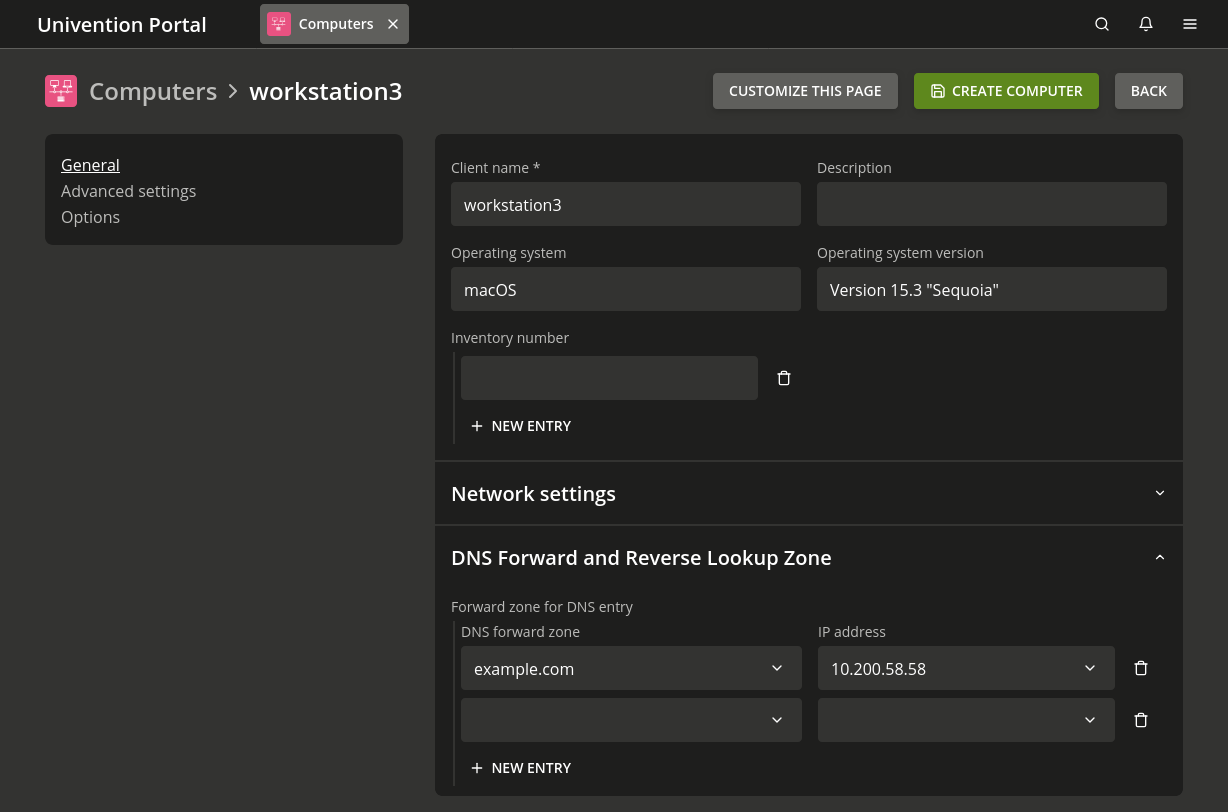
Fig. 7.5 Advanced computer settings#
- Name
For the name of the host.
To guarantee compatibility with different operating systems and services, ensure that the name matches the following criteria:
The name must start with a letter.
Only use the following characters:
Lowercase letters
a-z.Numbers
0-9.Hyphens and underscores
-_.Don’t use umlauts or special characters.
Microsoft Windows accepts computer names with a maximum number of 13 characters. Therefore, the recommendation is to limit the computer name to 13 characters, if you manage Microsoft Windows systems through your Nubus instance.
Important
After you created the computer object, you can only change the name for computers with the following roles:
Windows Workstation/Server
macOS Client
IP client
- Description
The description for the host.
- Inventory number
The inventory number for the host.
- Network
You can assign the host to an existing network object. For information about the IP configuration, Networks module.
- MAC address
The MAC address of the computer, for example,
2e:44:56:3f:12:32. The MAC address is essential for computer objects whose computers receive network information through DHCP.
- IP address
The static IP address of the host. For information about the IP configuration, see Networks module.
If you assigned a Network to the host, this field automatically shows an IP address from the network. Nubus uses DHCP to transfer the IP address to the host. If the host doesn’t use DHCP, you need to configure the host locally. For information about local network configuration, see Network configuration.
If the IP address for a host changes without changing the DNS zones, Nubus automatically changes the IP address in the computer object, and where they exist, in the DNS entries for the DNS forward and the DNS reverse lookup zones.
If you use the IP address for the host in other places, as well, you need to change them manually after you change the host IP address here. For example, if you use the IP address in a DHCP boot policy instead of the DNS name of the boot server, you need to manually change the IP address by editing the DHCP boot policy.
- Forward zone for DNS entry
The DNS forward zone for the computer. Nubus uses the zone to resolve the computer name to its assigned IP address. For information about the IP configuration, see Networks module.
- Reverse zone for DNS entry
The DNS reverse zone for the computer. Nubus uses the zone to resolve the computer IP address to its assigned computer name. For information about the IP configuration, see Networks module.
- DHCP service
Assign the DHCP service, if you want the computer to obtain its IP address through DHCP. For information about the IP configuration, see Networks module.
During assignment, you need to ensure that the DHCP servers of the DHCP service are responsible for the physical network. If you assign a network to the computer, Nubus automatically adds an appropriate entry for the network. You can adapt it before saving the computer object.
7.1.3. Advanced settings tab - Computer management#
The Advanced settings tab in the Computer management module has the following sections.
7.1.3.1. Account section#
The Account section on the Advanced settings tab in the Computer management module has the following fields:
- Password
Nubus creates and rotates the password automatically.
You can explicitly configure the password for the computer account here, if you need it for certain uses cases, such as the configuration of external systems. If you manually define the password here, you also need to save the password locally on the computer in the
/etc/machine.secretfile.- Primary group
Select the computer’s primary group. Defining the group manually is only necessary, if it deviates from the automatically created default group. Nubus uses default groups for the primary group depending on the system roles, as shown in Table 7.1.
Table 7.1 Primary groups for system roles# DC Backup HostsDC Backup HostsDC Slave HostsComputers
7.1.3.2. Unix account section#
The Unix account section on the Advanced settings tab in the Computer management module has the following fields:
- Unix home directory
You can define a different Unix home directory. The automatic default value is
/dev/null.- Login shell
You can define a different login shell for the computer account. The automatic default value is
/bin/bashfor UCS system roles, Ubuntu, and Linux clients. For Windows systems and mac OS the default value is/bin/false.
7.1.3.3. Services section#
The Services section on the Advanced settings tab in the Computer management module has the following fields. Only UCS system roles and the Windows Domain Controller display the Services section.
- Service
By means of a service object, applications or services can determine if a service is available on a computer or in the domain in general.
7.1.3.4. Deployment section#
The Univention Net installer uses the settings from the Deployment section. Only UCS system roles display the Deployment section.
7.1.3.5. DNS alias section#
The DNS alias section on the Advanced settings tab in the Computer management module has the following field:
- Zone for DNS Alias
You can configure additional DNS alias entries for the host, so that other systems reach the host through these aliases. The setting requires that computer has configured the Forward zone for DNS entry on the General tab - Computer management.
7.1.3.6. Alerts section#
Packaged service — only available for UCS appliance
A packaged service using this information is only available for the UCS appliance. However, you can manage the information in the Kubernetes deployment, as well.
The Alerts section on the Advanced settings tab in the Computer management module has the following field:
- Assigned monitoring alerts
Specifies the monitoring alert checks for this computer. For information, see Configure monitoring alerts.
7.1.3.7. Groups section#
Add the computer to groups.
7.1.4. Options tab - Computer management#
The Options tab allows activating or deactivating LDAP object classes for the host object. The Computer management module doesn’t display the corresponding fields of deactivated object classes. You can’t modify all object classes subsequently.
The Options tab in the Computer management module has the following fields:
- Kerberos principal
The deactivated checkbox means that the host doesn’t receive the
krb5Principalandkrb5KDCEntryobject classes.- POSIX account
The deactivated checkbox means that the host doesn’t receive the
posixAccountobject class.- Samba account
The deactivated checkbox means that the host doesn’t receive the
sambaSamAccountobject class.
7.1.5. Integration of Ubuntu clients#
You can manage Ubuntu clients in the Computer management module with their own system roles, together with the network properties for DNS and DHCP. You need to configure some aspects of the Ubuntu integration with Nubus directly on the Ubuntu system.
Nubus doesn’t support policies for Ubuntu clients.