8.2.2. Printers module#
This page describes the available tabs and fields of the Printers management module in the Management UI. It’s for functional administrators who manage printers and their shares in Nubus. However, administrators mostly use it in the context of Nubus for UCS with its share management capabilities. The following sections describe each tab of the module in detail.
The Printers management module enables functional administrators to create, modify, and delete printer objects through the Directory Manager. You find the Printers management module in the Management UI at , as shown in Fig. 8.9.
Fig. 8.9 The Printers management module in the device section of the Management UI#
8.2.2.1. Printers#
To create a printer share,
open the Printers management module,
click Add
and select Printer share: Printer as type.
Click Next.
For a description of the fields, see the following sections:
When you add, edit, or delete a printer, more specifically a printer share, Nubus automatically configures the printer share in the CUPS printing service.
CUPS doesn’t have an LDAP interface for printer configuration.
Therefore, Nubus creates the printers.conf configuration file for CUPS
through a listener module.
If you use Samba,
Nubus automatically creates the printer share for Microsoft Windows clients.
8.2.2.1.1. General tab - Printers module#
Fig. 8.10 shows the General tab in the Printers management module. This section describes the fields in this tab.
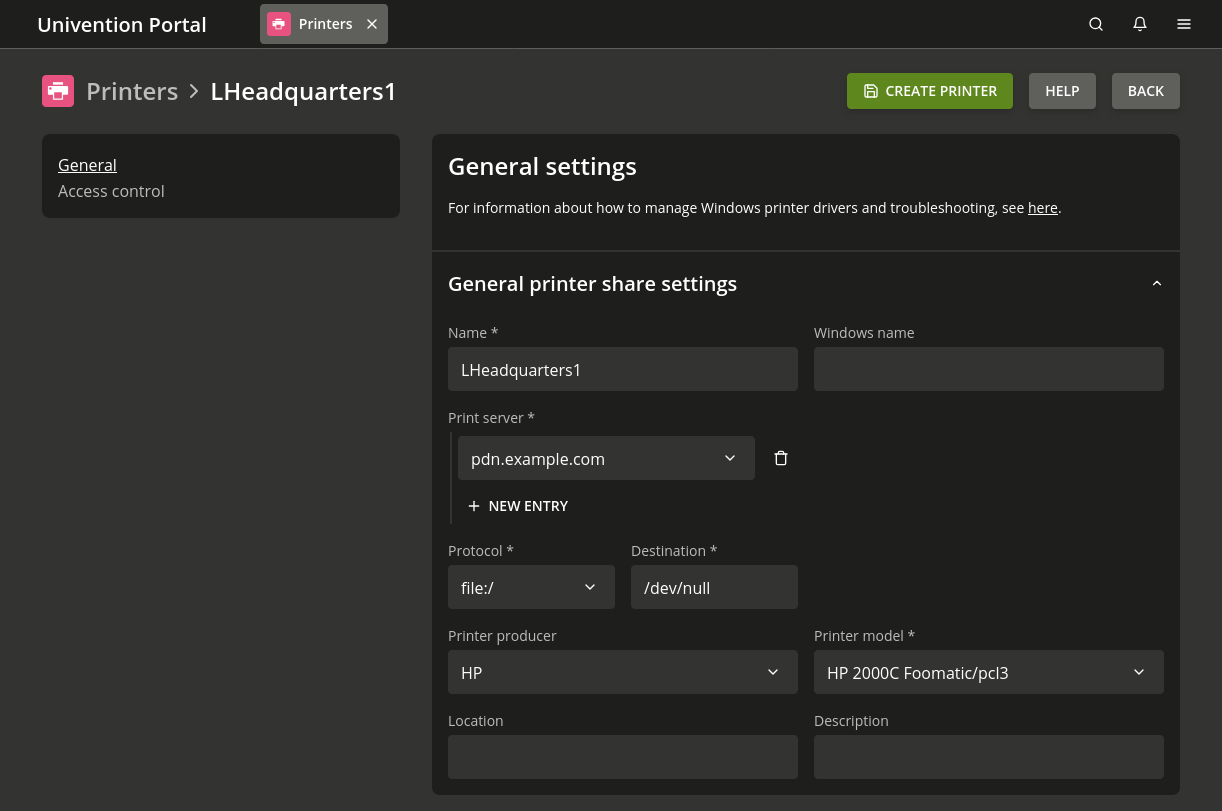
Fig. 8.10 Creating a printer share#
- Name
Specifies the name of the printer share. CUPS uses the name to identify the share. The printer appears under this name in Linux and Windows.
The name may contain alphanumeric characters, such as uppercase and lowercase letters
atoz, and numbers0to9, as well as, hyphens and underscores. Don’t use other characters, including blank spaces, because CUPS doesn’t allow them.
- Print server
A print server manages the printer queue for the printers that you want to share. It converts the print data into a compatible print format if necessary. If the printer isn’t ready, the print server temporarily saves the print jobs and forwards them to the printer subsequently. If you specify more than one print server, Nubus sends the print job to the first print server that becomes available.
The list of available print servers only lists Nubus for UCS systems that have the univention-printserver package installed and that have one of the following system roles:
Primary Directory Node
Backup Directory Node
Replica Directory Node
UCS Managed Nodes
See also
- Role concept
in Univention Corporate Server Architecture [6] for more information about the role concept.
- Protocol and Destination
The two input fields specify how the print server accesses the printer.
The following list describes the syntax of the individual protocols for the configuration of printers connected locally and directly to the server:
parallel://devicefileExample:
parallel://dev/lp0socket://server:portExample:
socket://printer_03:9100usb://devicefileExample:
usb://dev/usb/lp0
The following list describes the syntax of the individual protocols for the configuration of network printers:
http://server[:port]/pathExample:
http://192.0.2.10:631/printers/remoteipp://server/printers/queueExample:
ipp://printer_01/printers/xeroxlpd://server/queueExample:
lpd://192.0.2.30/bwdraft
cups-pdfTo integrate a pseudo printer to create a PDF document from all the print jobs, use the
cups-pdfprotocol. For more information about the setup, see Generating PDF documents from print jobs in Univention Corporate Server - Manual for users and administrators [3].file:/The
file:/protocol expects a path with a filename as target. CUPS doesn’t send the print job to a printer, but instead writes it to the file defined as target. The approach is useful for testing purposes. Each print job to this printer rewrites the file.smb://You can use the
smb://protocol to mount a Windows print share.For example, to integrate the
laser01printer share from Windows systemwin01, specifywin01/laser01as destination. You need to select the printer manufacturer and the model according to your printer. The print server uses the printer model settings to convert the print jobs where necessary and sends them directly to the URIsmb://win01/laser01. The protocol doesn’t use Windows printer drivers.
Independent of these settings, other Microsoft Windows systems can mount the printer shares with the corresponding printer drivers.
- Manufacturer
Select a printer manufacturer. The selection list for the Printer model automatically updates accordingly.
- Printer model
This selection list shows all printer PPD files available for the selected manufacturer. If the required printer model isn’t available, you can select a similar model and make a test print to establish correct function. For information about how to add additional printers the list of printer models, see Integrating additional PPD files in Univention Corporate Server - Manual for users and administrators [3].
- Windows name
You can assign an additional name to a printer that shows up in Microsoft Windows.
Unlike the CUPS name in Name, the Windows name may contain blank spaces and umlauts. The printer is then available to Microsoft Windows under both names, the CUPS name and the Windows name.
Using a Windows name in addition to the CUPS name is useful, for example, if the printer was already in use with Microsoft Windows under a name which contains blank spaces or umlauts. Windows computers can then still reach the printer under this name without the need to reconfigure the Windows computers.
- Location
Some applications show the printer location when you select the printer. You can write any text here.
- Description
Some applications show the printer description when you select the printer. You can write any text here.
8.2.2.1.2. Access control tab - Printers module#
This section describes the Access control tab in the Printers management module.
- Access control
Specify access rights for the printer here. You can limit access to the printer to certain user groups or users, or generally allow access and block certain user groups or users specifically. As default, printer access is available to all user groups and users. Nubus adopts the access control rights also for the corresponding Samba printer shares, so that the same access rights apply when printing through Samba as when printing directly through CUPS.
For example, in environments with several locations, you can limit the availability of printers to users of one location, so that the users at location A don’t see the printers of location B.
- Allowed/denied users
List of individual users for whom Nubus controls the access to the printer.
- Allowed/denied groups
List of individual user groups for whom Nubus controls the access to the printer.
8.2.2.2. Printer groups#
CUPS can group printers into classes, implemented as printer groups. Printer groups appear to clients as normal printers. The goal of such a printer group is to increase the availability of print services. If users print to printer group, CUPS sends the print job to the first printer in the printer group that becomes available. CUPS selects the printers based on the round-robin principle to keep the degree of utilization uniform.
You manage Printer groups through the Printer management module in the Management UI.
To create a printer group,
open the Printers management module,
click Add
and select Printer share: Printer group as type.
Click Next.
You see a screen as shown in
Fig. 8.11.
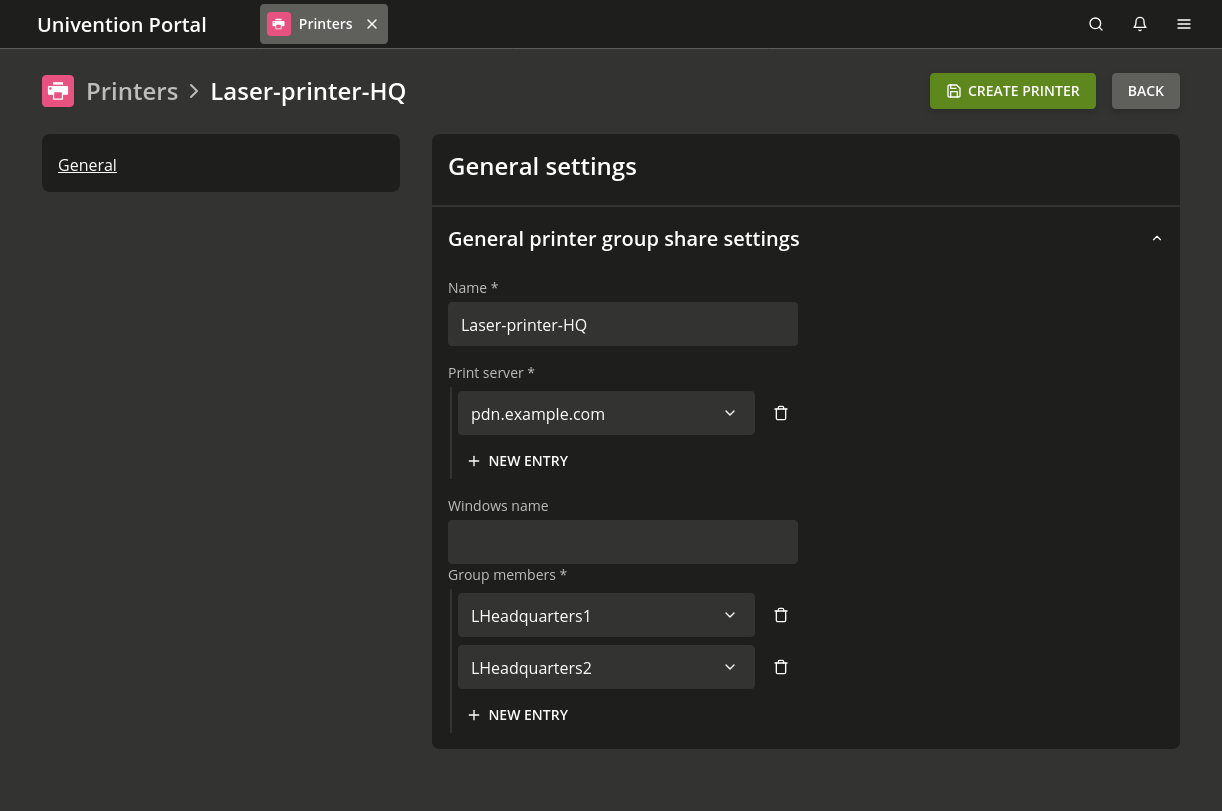
Fig. 8.11 Creating a printer group#
A printer group must have at least one printer as a member. Only printers from the same server can be members of the group.
Caution
Grouping printer shares from different print servers in a printer group makes it possible to select printer groups as members of a printer group. This could result in a printer group adopting itself as a group member.
Don’t create such a configuration.
The following list describes the fields for creating a printer group.
- Name
Specifies the name of the printer share. CUPS uses the name to identify the share. The printer group appears under this name in Linux and Windows. For the allowed characters, see Name.
- Print server
Specify a range of print servers, also called spoolers, to expand the list of printers available for selection. From the print servers that you assign here, you can select the printers as members of the printer group in Group members.
- Windows name
You can assign an additional name to a printer group that shows up in Microsoft Windows. For further details, see Windows name.
- Group members
Assign printers to the printer group. The selection comes from the assigned print servers at Print server.