13.7. Mounting of print shares in Windows clients#
The printer shares set up in the UMC module Printers can be added as network printers on Windows systems. This is done via the Control Panel under Add a device ‣ Add a printer. The printer drivers need to be set up during the first access. If the drivers are stored on the server side (see below), the drivers are assigned automatically.
Printer shares are usually operated using the Windows printer drivers provided. The network printer can alternatively be set up on the Windows side with a standard PostScript printer driver. If a color printer should be accessed, a driver for a PostScript-compatible color printer should be used on the Windows side, e.g., HP Color LaserJet 8550.
Caution
The printer can only be accessed by regular users when they have local permissions for driver installation or the respective printer drivers were stored on the printer server. If this is not the case, Windows may issue an error warning that the permissions are insufficient to establish a connection to the printer.
Windows supports a mechanism for providing the printer drivers on the print server (Point ‘n’ Print). The following guide describes the provision of the printer drivers in Windows for a print share configured in the UMC module Printers. Firstly, the printer drivers must be stored on the print server. There are a number of pitfalls in the Windows user wizard, so it is important to follow the individual steps precisely.
Firstly, the printer drivers must be downloaded from the manufacturer’s website. If you are using an environment in which 64-bit installations of Windows are used, you will need both versions of the drivers (32 and 64 bit). The
INFfiles are required.Now you need to start the printmanagement.msc program. Clicking on Add/remove server in the Action menu item allows you to add another server. The name of the printer server needs to be entered in the Add server input field.
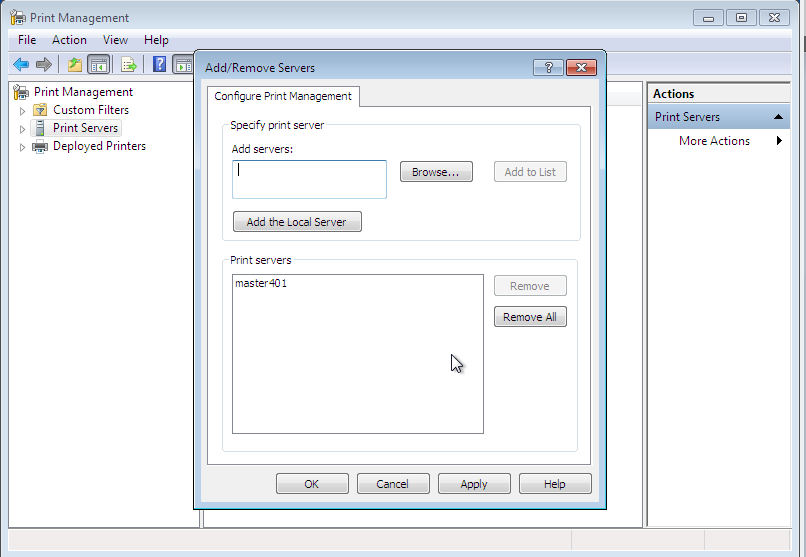
Fig. 13.3 Add printer server#
The newly added printer server should now be listed in the print management program. Clicking on Printers displays the printer shares currently set up on the printer server.
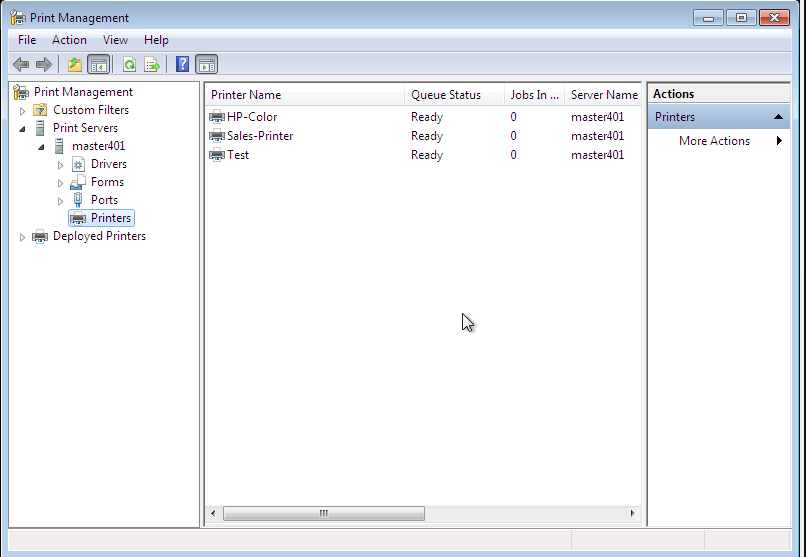
Fig. 13.4 Printer list#
Clicking on Drivers lists the saved printer drivers. Clicking on Add driver in the Action menu item opens the dialogue window for the driver installation.
We recommend downloading the printer drivers directly from the manufacturer and selecting them during the driver installation. If you are using an environment containing 64-bit versions of Windows, start by performing a check to see if the Univention Configuration Registry Variable
samba/spoolss/architectureis set toWindows x64on the UCS Samba system. If this is not the case, both the 32-bit and the 64-bit drivers must be uploaded; if your domain only uses 64-bit Windows systems, the 32-bit driver can be ignored. The drivers for the different Windows architectures can be uploaded one after the other or together.If both driver architectures are selected for uploading at the same time, the 64-bit driver should be selected first in the subsequent file selection window. Once Windows has uploaded these files to the server, it asks for the location of the 32-bit drivers again. They are then also uploaded to the server.
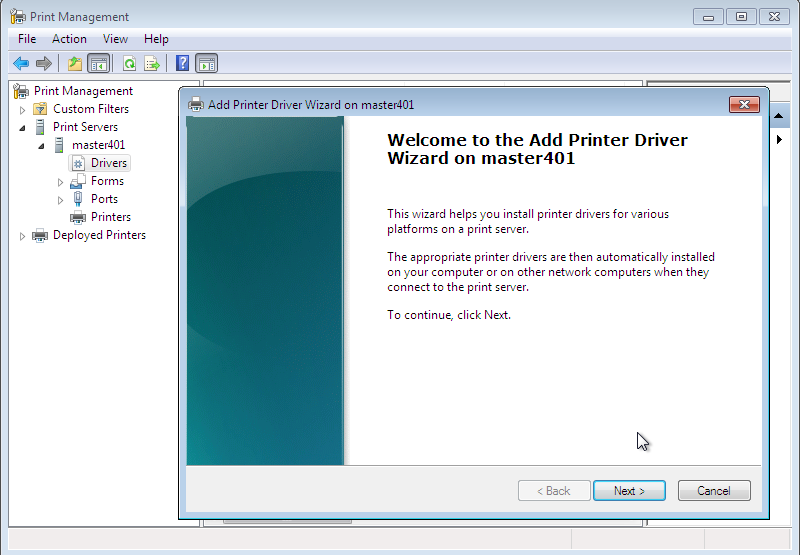
Fig. 13.5 Driver installation#
After these steps the drivers are stored in the directory
/var/lib/samba/drivers/on the print server.The print share now needs to be linked to the uploaded printer driver. To do so, the list of the printers available on the printer server is opened in the printmanagement.msc program. The properties can be listed there by double-clicking on the printer.
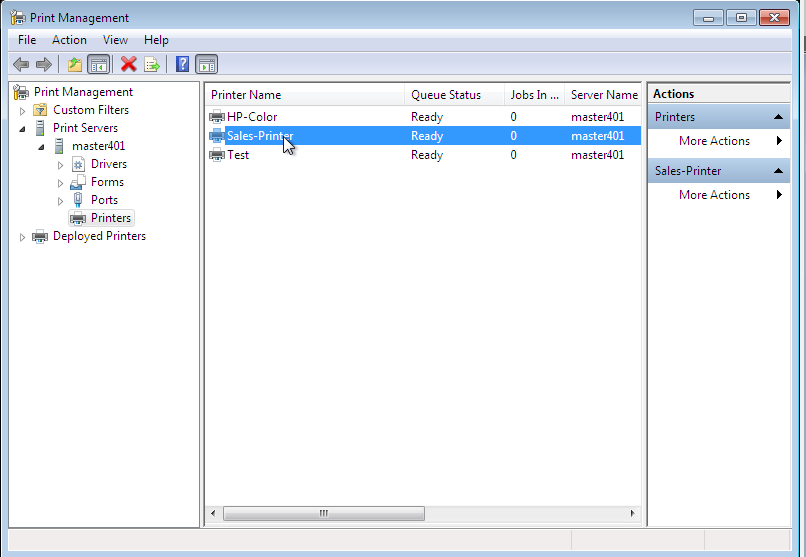
Fig. 13.6 Selecting a printer#
If no printer driver is saved, a message is displayed saying that there is no printer driver installed. The prompt to install the driver should be closed with No here.
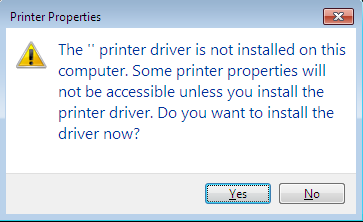
Fig. 13.7 Error message on first access#
The uploaded driver now needs to be selected from the drop down menu under Drivers in the Advanced tab. Then click on Apply (Important: DON’T click on OK!).
If the printer driver in question is being assigned to a printer for the first time, a dialogue window is shown, asking whether the printer can be trusted. This should be confirmed with Install driver. The printer drivers saved on the server side are now downloaded to the client. If the printer driver in question has already been downloaded to the Windows system in question in this manner before, Windows displays an error message at this point
0x0000007a. This can simply be ignored.Important: Now, instead of clicking directly on OK, you need to return to the General tab again. The old name for the printer share should still be displayed on the tab.
In UCS releases earlier than UCS 4.0-1, it is possible that the Windows system has changed the name of the printer share to the name of the printer driver. If that were accepted, the printer would no longer be associated with the share!
If this is the case, the name of the printer on the General tab (the first input field next to the stylized printer symbol) needs to be reset to the name of the print share. This can be done using the Windows name field configured in the UMC module Printers (or if this was left blank, use the value from Name). If the name has had to be reset in this fashion, Windows then asks if you are sure that you want to change the name when OK is clicked. Confirm the prompt.
To give the Windows printer driver the opportunity to save correct standard settings for the printer, you now need to switch to the Device settings tab. The name of the tab differs from manufacturer to manufacturer and may also be Settings or even just Configuration.
Clicking on OK closes the window. You can then print a test page. If Windows displays an error message here
0x00000006, the printer settings must be checked again to see whether there is a manufacturer-specific tab called Device settings (or something similar). If so, it should be opened and then simply confirmed with OK. This closes the dialogue window and saves the printer drivers settings (PrinterDriverData) in the Samba registry.At this point, it is also practical to make the settings for the paper size and other parameters, so that they are saved in the print share. Other Windows systems which subsequently access the print share will then find the correct settings automatically. These settings can usually be opened by clicking on the Standard values… button in the Advanced tab of the printer settings. The dialogue window which opens also varies from manufacturer to manufacturer. Typically, the settings for paper size and orientation are found on a tab called Page setup or Paper/Quality. Once the dialogue has been confirmed by clicking on OK, the printer driver saves these settings (as
Default DevMode) for the printer in the Samba registry.