6.1. User management through Univention Management Console module#
This section describes the user management through the UMC module Users.
6.1.1. User creation wizard#
To create users, administrators can use the simplified user creation wizard, as shown in the following screenshots.
You open the wizard by clicking the Add button in the Users module. In the first page Add a new user, you select the Container where you want to locate the user object and if you want to create a user account using a template.
When you click Next, you see the page in Fig. 6.1.
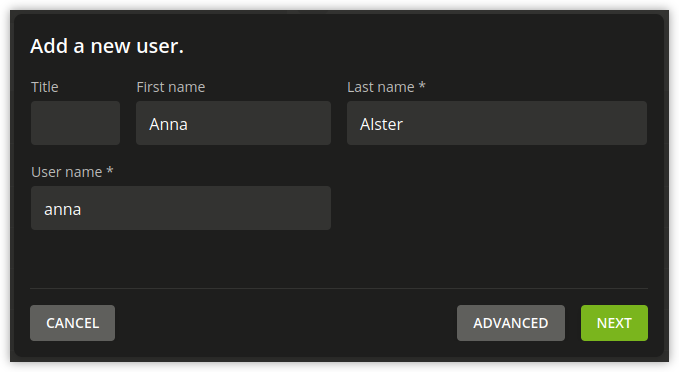
Fig. 6.1 Creating a user in the UMC module Users#
With Next, the Users module shows the third page as in Fig. 6.2, where you can define the initial password.
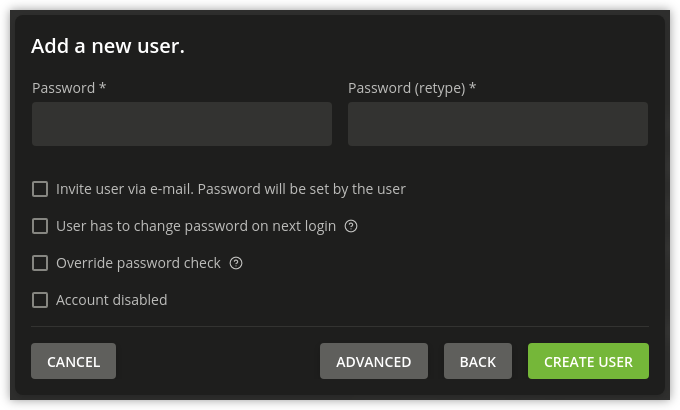
Fig. 6.2 Password setting for a user#
As an alternative the user may set the initial password themselves, if the UCS domain has the Self Service app installed. To allow the user setting the initial password by themselves, you must define their external email address.
To define an external email address, open the Advanced user account settings, click the tab Contact and provide an external email address in the field E-mail address. The self service app sends an email to the user’s external email address with a link and a token. The user can use the link to set their initial password and unlock the user account. For more information, refer to Password management via Self Service app.
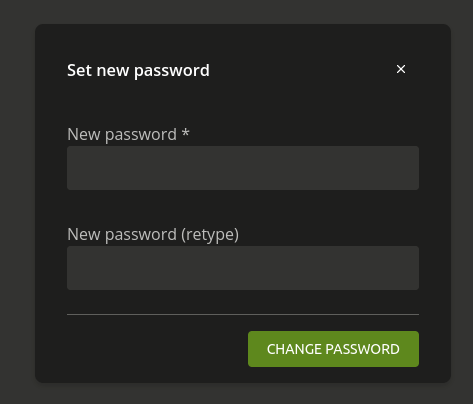
Fig. 6.3 Initial user password#
By default, the Users module shows a simplified wizard for creating a user. The wizard only requests the most important settings. To see all user account attributes as in Fig. 6.4, click Advanced in the wizard.
You can deactivate the simplified wizard by setting the
Univention Configuration Registry Variable directory/manager/web/modules/users/user/wizard/disabled to
true and restarting the univention-management-console-server.
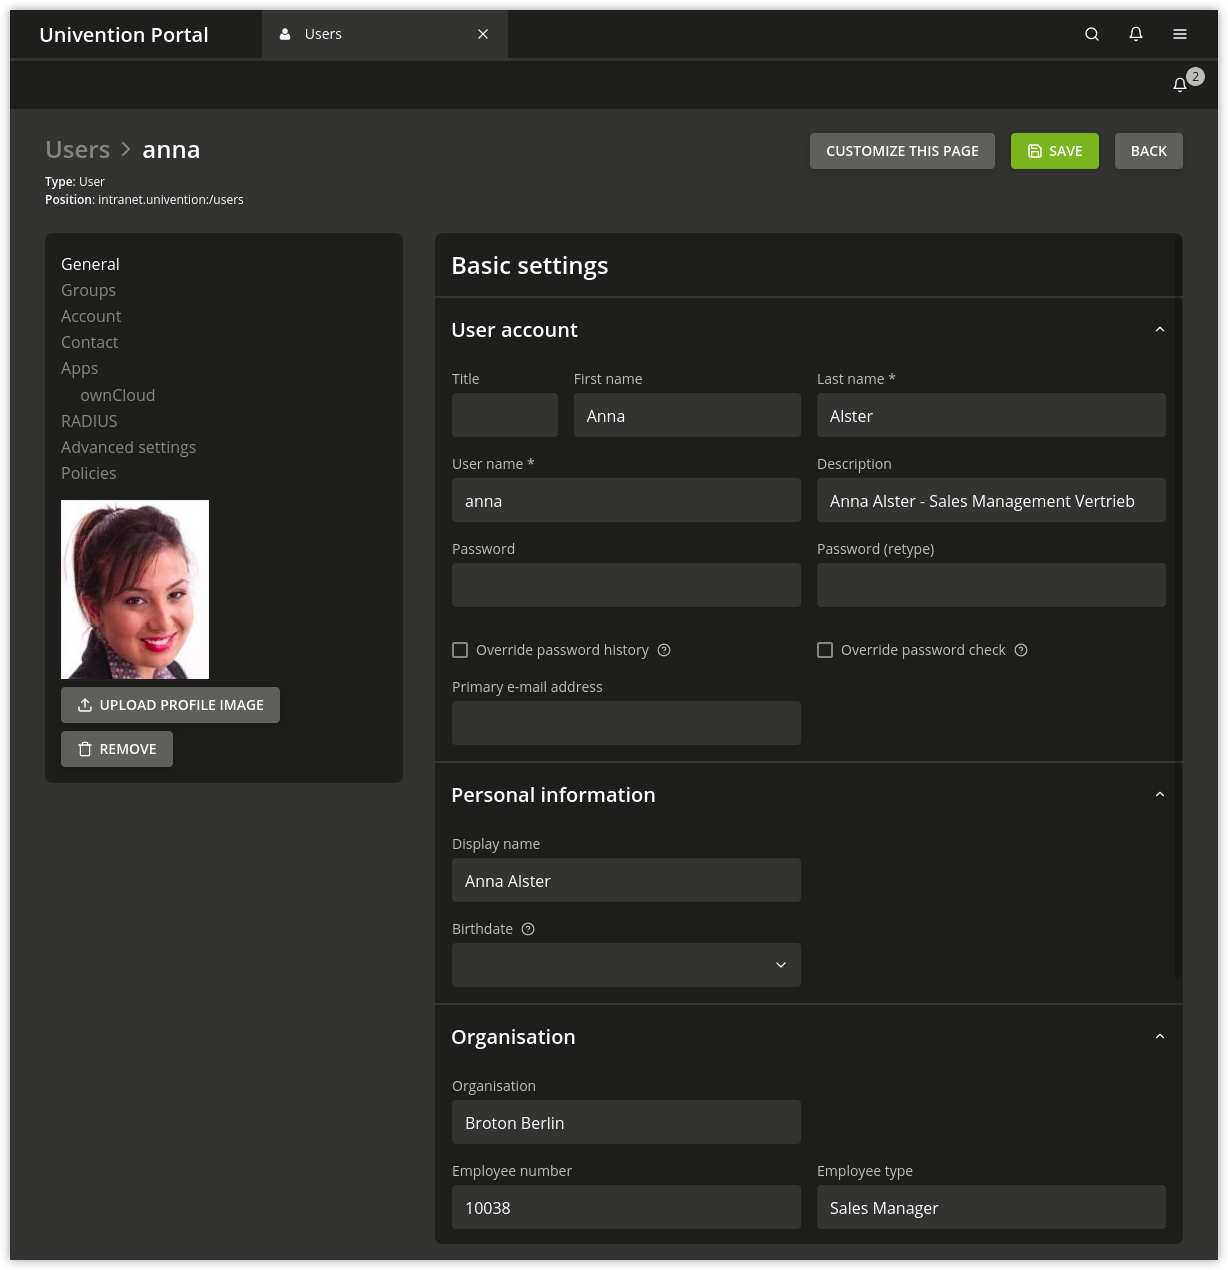
Fig. 6.4 Advanced user settings#
If you want to define the user’s primary email address in the simplified wizard,
you can activate the field by setting the
Univention Configuration Registry Variable directory/manager/web/modules/users/user/properties/mailPrimaryAddress/required to
true and restarting the univention-management-console-server.
The wizard’s second page then asks for the user’s primary email address,
as shown in Fig. 6.5.
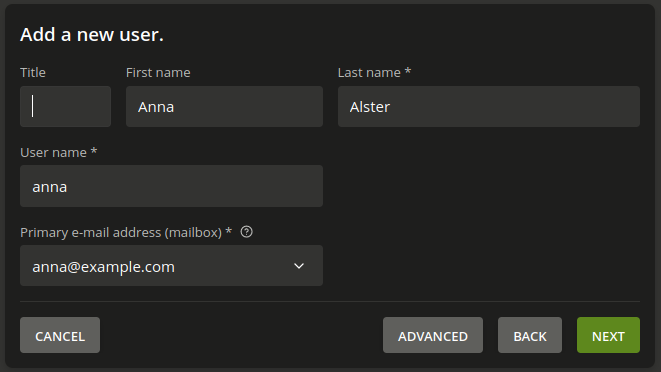
Fig. 6.5 Require setting the user’s primary email address in the wizard#
6.1.2. User management module - General tab#
Attribute |
Description |
|---|---|
Title |
The title of the user is to be entered here. |
First name |
The first name of the user is to be entered here. |
Last name |
The last name of the user is to be entered here. |
Username |
This is the name, by which the user logs into the system. For recommended characters for the user, see Recommendation for username definition. In order to ensure compatibility to non-UCS systems the creation of users
which are only distinguished from each other by upper and lower case
letters is prevented. Thus, if the username By default it is not possible to create a user with the same name as an
existing group. If the Univention Configuration Registry Variable
|
Description |
Arbitrary descriptions for the user can be entered here. |
Password |
The user’s password has to be entered here. |
Password (retype) |
In order to avoid spelling errors, the user’s password has to be entered for a second time. |
Override password history |
By checking this box, the password history is overridden for this user and for this password change. This means, with this change the user can be assigned a password which is already in use. Further details on user password management can be found in User password management. |
Override password check |
By checking this box, the requirements for the length of the password and for password quality checks are overridden for this user and for this password change. This means, the user can e.g. be assigned a shorter password than would be possible according to the defined minimum length. Further details on the password policies for users can be found in User password management. |
Primary email address (mailbox) |
The email address of the user is declared here, see Assignment of email addresses to users. |
Display name |
The display name is automatically composed of the first and surnames. It generally does not need to be changed. The screen name is used for the synchronization with Active Directory and Samba/AD among other things. |
Birthday |
This field is used to save a user’s birthday. |
Organization |
The organization is to be entered here. |
Employee number |
Numbers for staff members can be entered in this field. |
Employee type |
The category of the staff member can be entered here. |
Superior |
The superior of the user can be selected here. |
Picture of the user (JPEG format) |
This mask can be used to save a picture of the user in LDAP in JPEG format. In the default settings the file size is limited to 512 kilobytes. |
6.1.3. User management module - Groups tab#
Attribute |
Description |
|---|---|
Primary group |
This selection list can be used for specifying the user’s primary group.
All the groups registered in the domain are open for selection. By
default, the group |
Groups |
Here it is possible to set further group memberships for the user in addition to the primary group. |
6.1.4. User management module - Account tab#
Attribute |
Description |
|---|---|
Account is deactivated |
The Account is deactivated checkbox can be used to deactivate the user account. If the checkbox is selected, the user cannot log into the system. This affects all authentication methods. This is typically used when a user leaves the company. In a heterogeneous environment, an account deactivation might also be caused by external tools. |
Account expiry date |
A date is specified in this input field on which the account will automatically be locked. This is practical for user accounts that only need to be active for a certain period of time, e.g., for interns. If the date is deleted or replaced by a different, future date, the user will regain the right to sign in. |
User has to change password on next login |
If this checkbox is ticked, then the user has to change their password during the next login procedure. |
Password expiry date |
If the password is subject to an expiry date, then this date is displayed in this entry field. This entry field cannot be edited directly, see User password management. If a password expiry interval is defined, the password expiry date is automatically adjusted when passwords are changed. If no Expiry interval is declared, the old expiry date will be deleted and no new date will be set. |
Unlock lockout |
If the account has automatically been locked temporarily for security reasons, usually because the user has entered the password incorrectly too often, this checkbox can be used to unlock the account again manually before the lockout is lifted automatically when the lockout duration has passed. This temporary account lockout can happen if a corresponding domain wide policy setting has been defined by an administrator. There are three different mechanisms that may trigger lockout if configured properly:
|
Lockout till |
If the account has automatically been locked temporarily for security reasons, usually because the user has entered the password incorrectly too often, this field shows the time when the account automatically gets unlocked. |
Activation date |
If a user account shall only become usable at a later date, this can be set here. A cron job periodically checks if accounts need to be activated. It runs every 15 minutes by default. When saving the changes, the account is automatically marked as deactivated in case a date in the future has been specified. |
Windows home drive |
If the Windows home directory for this user is to show up on a different
Windows drive than that specified by the Samba configuration, then the
corresponding drive letter can be entered here, e.g. |
Windows home path |
The path of the directory which is to be the user’s Windows home
directory, is to be entered here, e.g. |
Windows logon script |
The user-specific logon script relative to the NETLOGON share is entered
here, e.g. |
Windows profile directory |
The profile directory for the user can be entered here, e.g.
|
Relative ID |
The relative ID (RID) is the local part of the SID. If a user is to be assigned a certain RID, the ID in question can be entered in this field. If no RID is assigned, the next available RID will automatically be used. The RID cannot be subsequently changed. Integers from 1000 upwards are permitted. RIDs below 1000 are reserved to standard groups and other special objects. |
Samba privilege(s) |
This selection mask can be used to assign a user selected Windows systems rights, for example the permission to join a system to the domain. |
Permitted times for Windows logins |
This input field contains time periods for which this user can sign in to Windows computers. If no entry is made in this field, the user can sign in at any time of day. |
Allow the authentication only on these Microsoft Windows host(s) |
This setting specifies the clients where the user may sign in. If no settings are made, the user can sign in to any client. |
UNIX home directory |
The path of the user’s home directory. |
Login shell |
The user’s login shell is to be entered in this field. This program is
started if the user performs a text-based login. By default,
|
User ID |
If the user is to be assigned a certain user ID, the ID in question can be entered in this field. If no value is specified, a free user ID is assigned automatically. The user ID can only be declared when adding the user. When the user data are subsequently edited, the user ID will be represented in gray and barred from change. |
Group ID of the primary group |
The group ID of the user’s primary group is shown here. The primary group can be changed in the General tab. |
Home share |
If a share is selected here, the home directory is stored on the specified server. If no selection is made, the user data are saved on the respective login system. |
Home share path |
The path of the home directory relative to the Home share is declared here. The username is already preset as a default value when creating a user. |
6.1.5. User management module - Contact tab#
Attribute |
Description |
|---|---|
Email address(es) |
Additional email addresses can be saved here. These are not evaluated by the mail server. The values of this attribute are stored in the LDAP attribute |
Telephone number(s) |
This field contains the user’s business phone number. |
Room number(s) |
The room number of the user. |
Department number(s) |
The department number of the user can be entered here. |
Street |
The street and house number of the user’s business address can be entered here. |
Postal code |
This field contains the postal code of the user’s business address. |
City |
This field contains the city of the user’s business address. |
Private telephone number(s) |
The private fixed network phone number can be entered here. |
Mobile telephone number(s) |
The user’s mobile numbers can be entered here. |
Pager telephone number(s) |
Pager numbers can be entered here. |
Private postal address(es) |
One or more of the user’s private postal addresses can be entered in this field. |
6.1.6. User management module - Mail tab#
This tab is displayed in the advanced settings.
The settings are described in Assignment of email addresses to users.
6.1.7. User management module - Options tab#
Attribute |
Description |
|---|---|
Public key infrastructure account |
If this checkbox is not ticked, the user will not be assigned the object
class |