5.4. Package installation and management#
You selected software components during setup based on your organization’s needs. These components cover the core functionality required to operate the system. However, you may need to install additional packages to extend Nubus for UCS with functionality beyond the initial setup. These optional packages aren’t required for core operations—they’re extra capabilities that your organization might need for specific services or integrations.
Package installation typically uses online repositories or a local repository. If your environment uses a local repository server for package distribution, see Local repository servers for setup and configuration. If you need to configure which repository servers your systems use, see Configure the repository server in Local repository servers.
When you install a package, the package manager automatically resolves and installs any package dependencies, so you don’t need to manually identify and install supporting packages.
If you need to install software that isn’t available as a Debian package,
place it in the /opt/ or /usr/local/ directories.
Use these directories to keep your custom software separate from Univention packages
and maintain a clean system architecture.
5.4.1. Choose your installation method#
You have several options to install additional packages on your Nubus for UCS system. Each method serves different administrative needs and preferences. All methods draw from the same package repositories, so the packages available to you are the same regardless of which method you choose.
- Univention App Center
Univention App Center offers a graphical interface where you can browse, search, and install applications and UCS components. You can choose from applications provided by Univention and third-party vendors for specific use cases and integration scenarios. For details, see Installation through Univention App Center.
- Package Management
The Package Management module in the Management UI lets you search for and install individual Debian packages. For details, see Installation through Management UI.
- Command line
The command line provides direct control over package management. Use the command line when you prefer scripting or need access to advanced options. For details, see Installation from command line.
5.4.2. Installation through Univention App Center#
Univention App Center hosts UCS components alongside applications from Univention and third-party vendors. You can install or remove UCS components directly from the App Center. For a glimpse on the App Center overview, see Fig. 5.3. To learn more about the App Center and its capabilities, see Univention App Center.
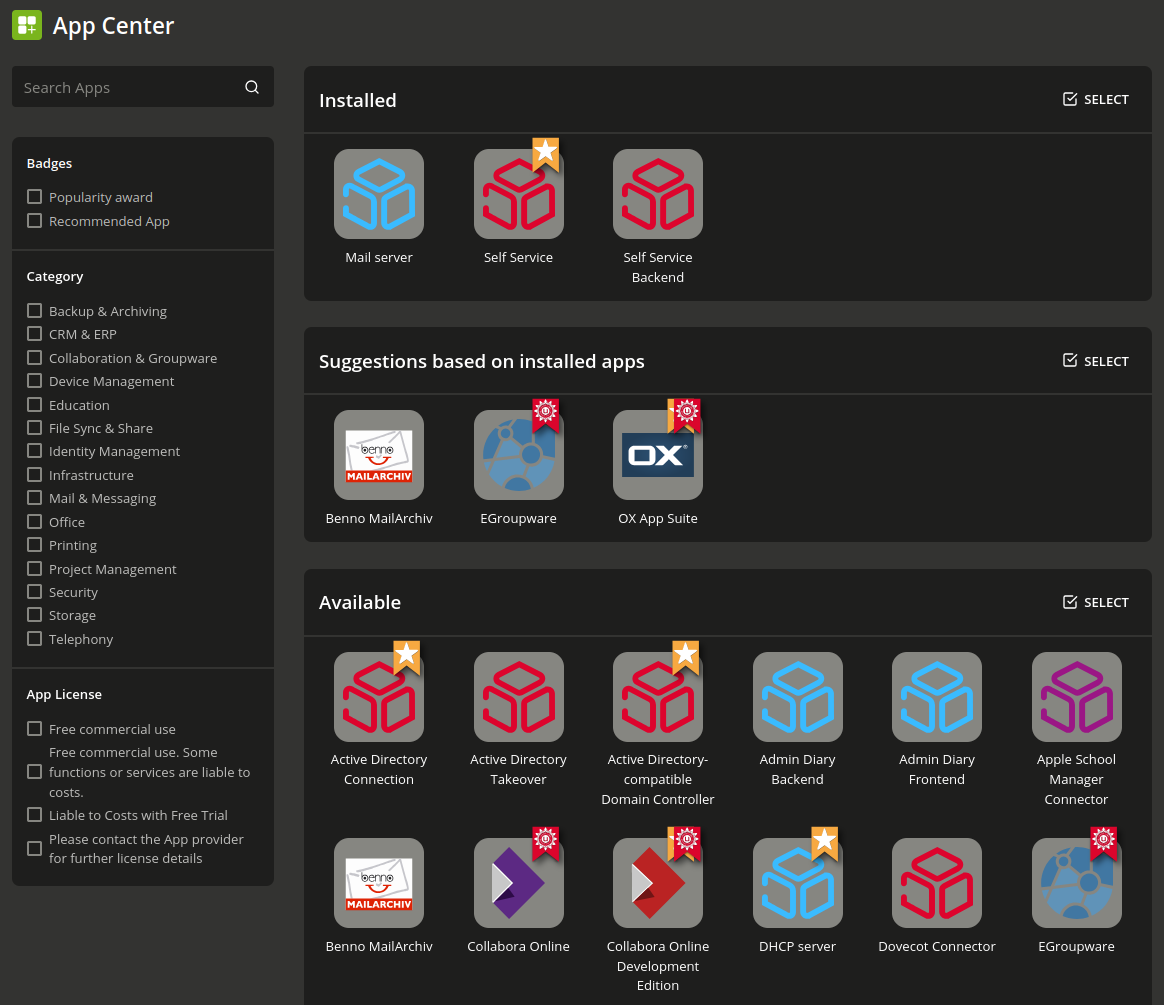
Fig. 5.3 UCS components and other apps in the App Center#
5.4.3. Installation through Management UI#
To use the Package Management module,
you need web access to the Management UI
and the Domain Admins group must include your user account.
The Package Management module in the Management UI provides a graphical interface to search for and install individual Debian packages. To open it, navigate to .
To find packages, you search by name or description. The search results display matching packages in a table with their names, descriptions, and installation status. Click an entry to view more details, then use the actions to install, uninstall, or upgrade the package. Fig. 5.4 shows package details.
- Action buttons
- Install:
Select to install a package that isn’t yet installed.
- Uninstall:
Select to uninstall an installed package.
- Upgrade:
Select to upgrade an installed package with an available update.
- Close:
Select to return to your previous search.
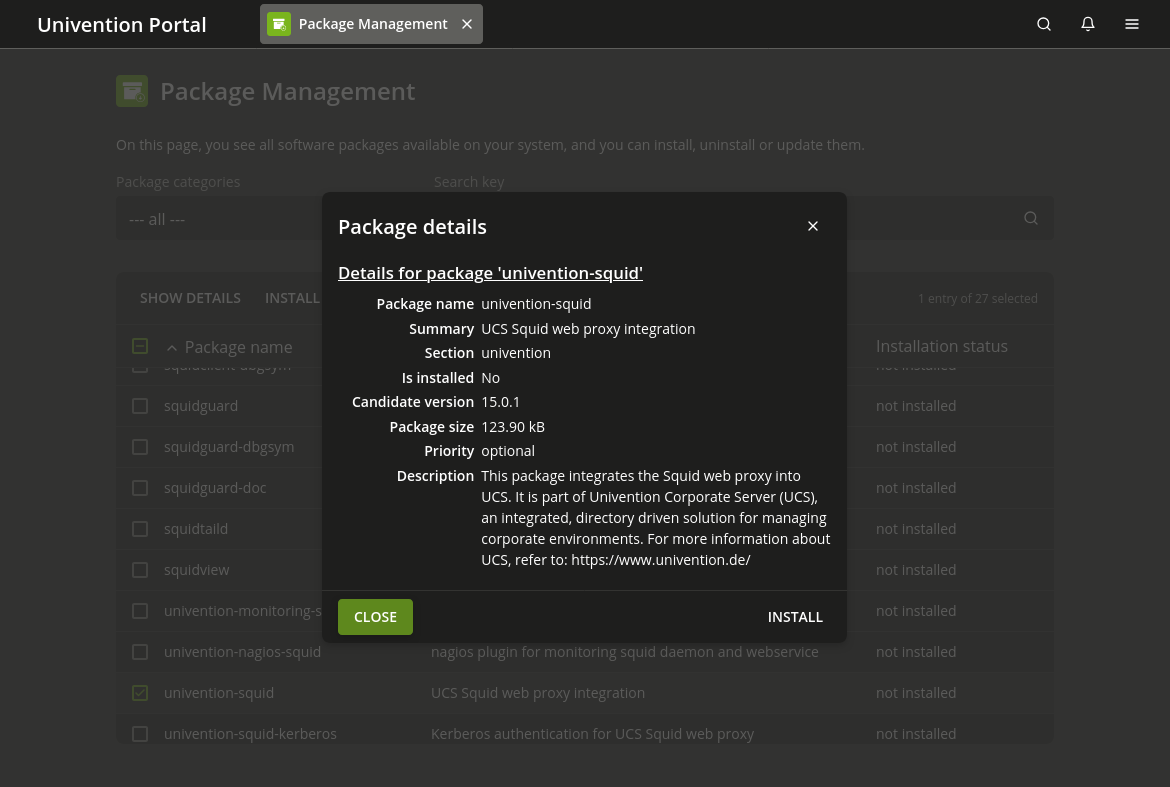
Fig. 5.4 Installing the package univention-squid through Package Management module#
5.4.4. Installation from command line#
Use the command line when you prefer working directly in the terminal.
You need root user rights to perform package management actions.
For interactive actions, use the univention-install.
For automation and integration in scripts,
use the apt-get command instead of univention-install.
- Install
To install a package, use the univention-install command in Listing 5.1.
$ univention-install <PACKAGENAME>
- Remove
To remove a package, use the univention-remove command in Listing 5.2.
$ univention-remove <PACKAGENAME>
- Usage
To view options and usage information for either command, add the
--helpflag as in Listing 5.3.$ univention-install --help $ univention-remove --help
- Search
To search for available packages by name or description, use apt-cache search as in Listing 5.4. This command lists all packages matching your search term in their name or description.
$ apt-cache search fax
5.4.5. Automate tasks around app actions with hook scripts#
You can use hook scripts to automate tasks
that run after you install, upgrade, or remove applications through Univention App Center.
Hook scripts are custom shell scripts that run at specific lifecycle events.
This feature is for advanced administrators
who understand shell scripting and app identifiers—the appid.
Important
Hook scripts only apply to applications installed through the App Center, not to individual Debian packages.
- Prerequisites
To use hook scripts, you need:
rootuser access on the system.Shell scripting knowledge.
Understanding of the app identifier
appidfor your target app.
- How hook scripts work
When you install, upgrade, or remove an App Center application, the system looks for hook scripts in specific directories and runs them automatically. Each hook script phase corresponds to a lifecycle event:
- Post-install:
Runs after you install the app.
- Post-upgrade:
Runs after you update the app.
- Post-remove:
Runs after you remove the app.
- Storing hook scripts
Place your custom hook scripts in one of these directories. Replace
{appid}with the identifier of your target app./var/lib/univention-appcenter/apps/{appid}/local/hooks/post-install.d//var/lib/univention-appcenter/apps/{appid}/local/hooks/post-upgrade.d//var/lib/univention-appcenter/apps/{appid}/local/hooks/post-remove.d/
- File requirements
Names must contain only lowercase letters and numbers, regular expression:
^[a-z0-9]+$.Mark the scripts executable: chmod +x filename.
run-parts runs the scripts in order.
- Practical examples
You might use hook scripts for tasks like the following:
Restart a service after installation.
Configure application-specific settings in a post-install script.
Back up configuration files or persistent data before removal.
Clean up temporary files in a post-remove script.
- Testing and troubleshooting
To test which scripts would execute in a directory without running them, use the command shown in Listing 5.5. Script errors and diagnostic messages appear in
/var/log/univention/appcenter.log. For more information, see man run-parts.$ run-parts --test /var/lib/univention-appcenter/apps/appid/local/hooks/post-install.d/
- Security and permissions
Set appropriate file ownership, typically
root:root.Use restrictive permissions, typically
0755for executable scripts.Avoid world-writable scripts to prevent unauthorized modification.
Validate inputs and sanitize variables in your scripts.
5.4.6. Centralized package management with policies#
This approach suites organizations that manage multiple system centrally and need consistent deployments to reduce manual effort and prevent configuration drift.
- When to use policies
Use policies when you need to:
Deploy identical packages to multiple systems consistently.
Manage packages for different roles or departments separately.
Scale package management across growing numbers of systems.
Maintain package configurations across multiple locations or departments.
- Prerequisites
To work with package policies, you need:
The
Domain Adminsgroup must include your user account.Access to the Management UI.
Understanding of your system’s organizational structure in form of containers and organizational units in the directory service.
- How to find and create policies
You manage package policies through the Management UI. To create a policy, use the following steps:
Open the Management UI
Navigate to .
To create a policy, click Add.
Select the package policy type for your system role, for example Policy: Packages for Managed Nodes.
Choose the container where to store the policy.
Click Next
The General tab shows fields for the selected policy type. The Advanced settings tab provides additional configuration options.
Click Save to finally create the policy.
- Understanding policy fields
Each package policy has the following main fields:
- Name
An unambiguous name for the policy, for example Database Server Packages or Development Team Workstations.
- Package installation list
A list of package names to install. Example:
postgresql postgresql-contrib mysql-server
- Package removal list
A list of packages to remove. Example:
xserver apache2
- Scope and limitations
Package policies inherit down the directory container hierarchy. Nubus applies the policy values defined closest to the object. For detailed information about policy inheritance, conflict resolution, and advanced policy options, see Policies module in Nubus Manual 1.x [4].
- Managing packages at scale
When you manage multiple systems across multiple locations or departments keep the following recommendations in mind:
Create separate policies for each role or department to maintain clear ownership.
Use meaningful policy names that indicate their purpose and scope.
Test policies on a small group of systems before you deploy them organization-wide.
Document which policies apply to which containers or organizational units.
Use the Referencing objects section in a policy to verify which systems have the policy applied.
- Installation timing
The maintenance policy defines the time when Nubus for UCS installs or removes packages. For configuration details, see Package maintenance policy. Nubus registers all packages from policies in the LDAP directory to make them available for management across the entire domain.
See also
For more information about policies in general, including policy creation, assignment, and advanced settings, see Policies module in Nubus Manual 1.x [4].
For information about computer management in your domain, see Computers module in Nubus Manual 1.x [4].